UK Monster Owners Club Forum » .: General :. » Random Chat » Life after the Slow Monster Rebuild

Reply
 
Thread Tools Display Modes
Old 27-03-2021, 07:50 AM   #46
jerry
Old Git
 
jerry's Avatar
 
Join Date: May 2006
Location: Cricklade
Bike: Multiple Monsters
Posts: 2,820
Ducati ellectronica also make electric garage doors ,, wonderful work there 350TSS
__________________
MONSTERMAN
jerry is offline   Reply With Quote
Old 11-04-2021, 05:23 PM   #47
350TSS
Too much time on my hands member
 
350TSS's Avatar
 
Join Date: Jan 2013
Location: Shipbourne
Bike: M900
Posts: 1,419
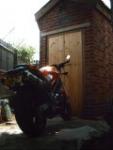
I got the spare tank and side panels down from the garage loft. The tank is clean inside but has some rust bubbles on the lower seams and where a jacket zip has scratched through the paint. The cap is heavily corroded and I cannot work out how to get it off. The (what was once) chrome bit is just an escutcheon and the lid itself is held on by a sel-lok pin which cannot be removed with the cap on.
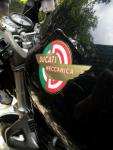
Almost certainly I will not be able to buy a new chrome bit but if I can get it off without damaging it I should be able to scour off the remains of the chrome and either nickel plate it or if the pitting is too bad paint it satin black. The lining on the tank is painted not a transfer. and the raised badge is plastic, presumably glued on as there are no evident fasteners. I think it highly likely that trying to remove the badges will end badly so I shall paint over them and recolour the badges, white, silver, red and black with an artist's brush.
The badges on the side panels are also plastic with 4 plastic pegs through the steel side panel and were attached inside with those horrible spring clinch clips. Removal of the clips resulted in 8 broken and truncated pegs.


I had a small success with the pitted top headrace bearing. I had a half-hearted attempt at removing the offending race (half-hearted because I was pretty certain that I would not be able to acquire another) and failing.
I thought the least I could do was to treat the race to new ball bearings (in reality a necessity because one had gone AWOL on dismantling). 6mm replacements were not available but 1/4" were so I bought them and when I fitted them the head bearings work perfectly with no trace of notchiness. I think the larger size means that the balls track on the race in a place that is 0.17mm different from the originals and it is enough to miss the indents in the race.


I am still waiting the return of my re-chromed fork legs, in the meantime, I shall get on with re-spraying the tank and side panels.

Last edited by 350TSS; 11-04-2021 at 05:25 PM..
350TSS is offline   Reply With Quote
Old 11-04-2021, 07:15 PM   #48
Luddite
Registered User
 
Luddite's Avatar
 
Join Date: Aug 2011
Location: Southampton
Bike: M1100evo
Posts: 2,465
I posted a link to Mdina Italia in another thread yesterday. You might be interested to know that they also do Morini parts including, what appear to be, your tank badges, (if you wanted to try removing yours).

https://www.mdinaitalia.co.uk/M330104.html

Luddite is offline   Reply With Quote
Old 11-04-2021, 08:36 PM   #49
Luddite
Registered User
 
Luddite's Avatar
 
Join Date: Aug 2011
Location: Southampton
Bike: M1100evo
Posts: 2,465
Regarding the attachment method for the tank badges, I found this photo of your type of tank, which shows two fixing holes. I've also found a picture of the reverse of the badges showing the pins, which appear to be ridged, presumably to grip the holes.


Luddite is offline   Reply With Quote
Old 11-04-2021, 11:44 PM   #50
utopia
No turn left unstoned
 
utopia's Avatar
 
Join Date: Jun 2010
Location: leicester
Bike: M750
Posts: 4,545
Quote:
Originally Posted by 350TSS View Post
I think the larger size means that the balls track on the race in a place that is 0.17mm different from the originals and it is enough to miss the indents in the race.
Hmmm ... I'm not so sure about that.
Surely the 6mm balls do not track at a single point but rather they make contact across the full width of the races which have a matching 6mm concave form.
The larger 1/4 inch balls will probably make contact at the two extreme edges of the concave form of the races.
This may mean that they avoid the central, indented area to some extent and initially run more smoothly but the loading will be concentrated over two narrow bands instead of across the full width of the races and they will probably deteriorate in short order.


On the side panel badges ...
I appreciate that you may want to restore the bike to as close as possible to its original appearance but to be honest .. and this is just a personal opinion .. I have always thought that the "three and a half" moniker was a little tacky.
If it was my bike I would probably leave the sidepanel badges off completely.
utopia is offline   Reply With Quote
Old 12-04-2021, 04:00 AM   #51
350TSS
Too much time on my hands member
 
350TSS's Avatar
 
Join Date: Jan 2013
Location: Shipbourne
Bike: M900
Posts: 1,419
Thanks Luddite, it never ceases to amaze me how you give so much of your time to help people on here researching information and posting it, much appreciated.
I will have a go at removing the old tank badges and hope the pegs in the new ones fit whatever holes I have in my replacement tank (my original heavily corroded and thus scrap tank is the same as the picture you posted, my replacement tank has a different profile at the transition between the sides and the top surface).
Hand painting the old badges will, I think, always look a bit naff and since the badges are plastic would not be a very durable look either.

Utopia - on the side panels I completely agree re the tackiness of the "3 1/2" badges but there are four appropriately spaced holes in each side panel to mount said tacky badges so regrettably, they will probably go back.
Re the head bearings and using 0.35mm larger balls you might well be right concerning the increased point loading and longevity and I did think carefully about it before fitting them.
My uneducated and probably flawed logic went thus.
In a conventional ball bearing the track in both halves is almost certainly ground to match the diameter of the rolling balls (you can even buy bearings with increased clearance for hot running (C3)). The contact patch for each of the balls will not just be North and South parallel to the shaft and East and West at right angles to the shaft but at all points around the circumference of each of the balls in the cross-sectional plane.
A split headrace bearing on the Morini is not split in the horizontal plane but rather at an angle so one half of the split bearing is more than 180 degrees of the bearing and the other less than 180 degrees (the top track is deeper at the outside than the inside and the lower track is higher inside than outside)
If the track was ground precisely to fit the circumference of the balls then you would not be able to insert the balls into the track with the greater portion of the split. (The bearing tracks on the Morini do not appear to be high-quality ground finishes but rather machined surfaces with very slight machining marks.) This larger portion of the bearing track, therefore, has to have some lateral play. Once the principle of lateral play is accepted then the increase in point loading on the bearing is inevitable - it fits where it touches.
Interestingly I think pushbike head-bearing tracks are split horizontally but the split is wide enough to allow the balls to be inserted.
The fact that when head races are loose you can rock the bearing and therefore the forks must point to the inevitability of high point loading within the bearing, also the fact that when worn the bearing tracks show circular indents rather than circumferential lines.
I know it is not good practice to fit the wrong sized balls but this is not a bearing supporting a crankshaft rotating at great speed with long-duration rotational and vibrational loadings, it has occasional partial rotation and periodic shock loads (tempered by the effectiveness of the suspension) to deal with.
In my defense, a new bearing track is not available and the right size balls were not obtainable so it was Hobson's choice.
350TSS is offline   Reply With Quote
Old 12-04-2021, 09:26 AM   #52
Luddite
Registered User
 
Luddite's Avatar
 
Join Date: Aug 2011
Location: Southampton
Bike: M1100evo
Posts: 2,465
Happy to help, Rich. As I've mentioned before, I don't have either the knowledge or ability to even attempt what you've done, much as I'd like to be able to. So I'll just have to be content with occasionally offering, hopefully useful, snippets of information.

One thing to note with those badges - that second photo I used was of an original one, just to show the pins. The Mdina Italia version, (first photo), is a repop and is listed as "self adhesive", so bear that in mind, if that's important to you. Personally, I'd be happy with self adhesive, as the genuine Ducati plastic logos I used on my repainted tank panels were also self adhesive and they haven't moved in over four years.

For removing the old badges, if you haven't got them already, some cheap plastic car trim removal tools are handy, like these...


https://www.amazon.co.uk/KingSaid-Re.../dp/B07MJQFLDL
Luddite is offline   Reply With Quote
Old 12-04-2021, 11:48 AM   #53
Darkness
.
 
Darkness's Avatar
 
Join Date: May 2007
Location: Stockbridge
Bike: M900
Posts: 1,984
Quote:
Originally Posted by utopia View Post
Hmmm ... I'm not so sure about that.
Surely the 6mm balls do not track at a single point but rather they make contact across the full width of the races which have a matching 6mm concave form.
The larger 1/4 inch balls will probably make contact at the two extreme edges of the concave form of the races.
This may mean that they avoid the central, indented area to some extent and initially run more smoothly but the loading will be concentrated over two narrow bands instead of across the full width of the races and they will probably deteriorate in short order.
I don’t see how the 6mm balls can bear on the full width of the ball race as it would stop the balls from rolling?
The purpose of the balls is to take away friction by allowing the balls to roll, but the linear (Or circular in this application) distance travelled per revolution of the ball is proportional to the perpendicular distance from the axis of rotation of the ball. Taken to extreme, and ignoring the friction between top and bottom races where they meet, if half of the ball were within each ball race, rotation of the balls would create movement at the top and bottom of theball, but progressively less movement as you approach the axis of the ball. The difference in movement would require the balls to slide across parts of the ball race, or lock the bearing solid if it can’t slide.

Tapered roller bearings are better because they can bear across full width of the roller without needing to slide, provided the geometry of the tapers is accurate.
__________________
Original and Best since 1993
Darkness is offline   Reply With Quote
Old 12-04-2021, 02:19 PM   #54
slob
.
 
slob's Avatar
 
Join Date: Jul 2003
Location: East London
Bike: Multiple Monsters
Posts: 9,712
Are the bearings/races really such an odd size you can't get (even taper roller) replacement sets?

I got a similar 5 piece trim removal tool set from Machine Mart for about £10. In a shop working on sports-bikes and scooters, they are among the most used items in my toolbox.
slob is offline   Reply With Quote
Old 12-04-2021, 02:54 PM   #55
350TSS
Too much time on my hands member
 
350TSS's Avatar
 
Join Date: Jan 2013
Location: Shipbourne
Bike: M900
Posts: 1,419
Luddite - thanks again - I do not have anything like those trim removers and I used stirring sticks for resin -same as long lolly sticks and they worked with the loss of one badge locating peg on either side. Self-adhesive badges are definitely the way to go.
Darkness - I am sure you are right re the science of ball bearings - all I know is that the head bearings as configured work, whether they will last is another matter.
Slob - I would have loved to have found tapered roller bearings to fit but the Moto Morini way of doing things was to press the tracks that fit into the frame with an integral collar that sits top and bottom of the headstock tube. The ball races themselves are above and below the headstock tube not inside it. There is no internal collar inside the headstock tube for the outer races of a tapered roller to bear on. Additionally, the OD of the steering stem is not much smaller than the ID of the headstock tube so no real room for a tapered roller.

Today I have mostly been rubbing down and priming side panels, removing the badges and rubbing down the tank, dismantling the petrol cap arrangement and nickel plating the escutcheon cover. I am pleased with how it turned out.

Last edited by 350TSS; 12-04-2021 at 02:57 PM..
350TSS is offline   Reply With Quote
Old 12-04-2021, 03:20 PM   #56
slob
.
 
slob's Avatar
 
Join Date: Jul 2003
Location: East London
Bike: Multiple Monsters
Posts: 9,712
Quote:
Originally Posted by 350TSS
... the Moto Morini way of doing things was to press the tracks that fit into the frame with an integral collar that sits top and bottom of the headstock tube. The ball races themselves are above and below the headstock tube not inside it. There is no internal collar inside the headstock tube for the outer races of a tapered roller to bear on. Additionally, the OD of the steering stem is not much smaller than the ID of the headstock tube so no real room for a tapered roller ...
slob is offline   Reply With Quote
Old 12-04-2021, 03:34 PM   #57
Darren69
Transmaniacon MOC
 
Darren69's Avatar
 
Join Date: Sep 2013
Location: Sutton In Ashfield
Bike: Multiple Monsters
Posts: 6,023
The chrome filler caps should still be readily available, the exact same were used on many Italian bikes from the 70's I have one on my Laverda exactly the same, Guzzi too. They're not cheap though. You may even still be able to get spares for them.
__________________
Roast Beef Monster!

Termignoni and Bucci - Italian for pipe and slippers!

S4 Fogarty, S4R 07T, 748, Series 1 Mirage
Darren69 is offline   Reply With Quote
Old 12-04-2021, 09:21 PM   #58
jerry
Old Git
 
jerry's Avatar
 
Join Date: May 2006
Location: Cricklade
Bike: Multiple Monsters
Posts: 2,820
Are you going to repaint the bike because that blue colour is insipid even if its original
__________________
MONSTERMAN
jerry is offline   Reply With Quote
Old 15-04-2021, 04:35 PM   #59
350TSS
Too much time on my hands member
 
350TSS's Avatar
 
Join Date: Jan 2013
Location: Shipbourne
Bike: M900
Posts: 1,419
The postman knocked twice today.
First, was my package with a clutch cover gasket, oil filter gasket, self-adhesive badges and 2 x exhaust port gaskets all for £55 - Bargain???

I got on with priming and giving the tank and the side panels the first couple of coats of Ducati red (left over from the slow Monster project).

Then late this afternoon the postie delivered my re-chromed forks, exactly on the day Dynasurf promised them (£157 including £13 return postage and packaging). I thought it would be churlish not to fit them immediately so the stanchions are now in place.
.
Apart from a little bit of re-wiring (not my favourite part of any build) and finding a kickstart return spring I do not think there is much to stop this build now (famous last words?). My ETTC is <80 hours
350TSS is offline   Reply With Quote
Old 17-04-2021, 04:43 PM   #60
350TSS
Too much time on my hands member
 
350TSS's Avatar
 
Join Date: Jan 2013
Location: Shipbourne
Bike: M900
Posts: 1,419
Bit of progress today, the tank and side panels got a rub down and a couple of clear coats.

Not too bad a finish for a rattle can job, some imperfections where the originally painted tank lining was, and a couple of ripples that were actually in the steel pressing from manufacture.
I then had a bit of a struggle getting it onto its wheels, not easy on your own particularly if you are trying to protect the paint finish on the frame. Managed it eventually with only a couple of chips that can be easily repaired.
.
350TSS is offline   Reply With Quote
Reply


Posting Rules
You may not post new threads
You may not post replies
You may not post attachments
You may not edit your posts

BB code is On
Smilies are On
[IMG] code is On
HTML code is On

Forum Jump


All times are GMT. The time now is 10:06 AM.

vBulletin Skins by vBmode.com. Powered by vBulletin® Version 3.8.3
Copyright ©2000 - 2024, Jelsoft Enterprises Ltd.