UK Monster Owners Club Forum » .: Technical :. » Mods & How To's » Ducati 1000 DS custom build

Reply
 
Thread Tools Display Modes
Old 15-01-2024, 01:13 PM   #91
utopia
No turn left unstoned
 
utopia's Avatar
 
Join Date: Jun 2010
Location: leicester
Bike: M750
Posts: 4,545
Quote:
Originally Posted by buzzer View Post
Thanks, I have ordered a 41mm FCR already! would love to get some jet suggestions!
Sorry ... crossed purposes there ... the jetting info I have is for the std carb but fitted with a pod filter and free-flow exhaust.
I'm still dithering on fitting the Keihin flatslide.
utopia is offline   Reply With Quote
Old 15-01-2024, 03:29 PM   #92
Dukedesmo
Registered User
 
Dukedesmo's Avatar
 
Join Date: Sep 2010
Location: Leics
Bike: M900
Posts: 2,844
Quote:
Originally Posted by buzzer View Post
Thanks, I have ordered a 41mm FCR already! would love to get some jet suggestions!


I will keep posting progress guys!
Don't know about the jetting on this setup though I did mess with mine on the Monster but you could do worse than take a look at; http://www.factorypro.com/tech/tech_...Burns,pat.html
__________________
M900, 916, LeMans II.

Dukedesmo is offline   Reply With Quote
Old 16-01-2024, 12:30 PM   #93
buzzer
Registered User
 
buzzer's Avatar
 
Join Date: Jun 2018
Location: Wolverhampton
Bike: M900
Posts: 392
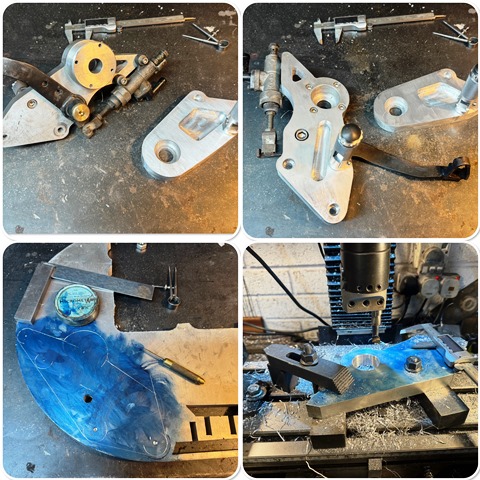
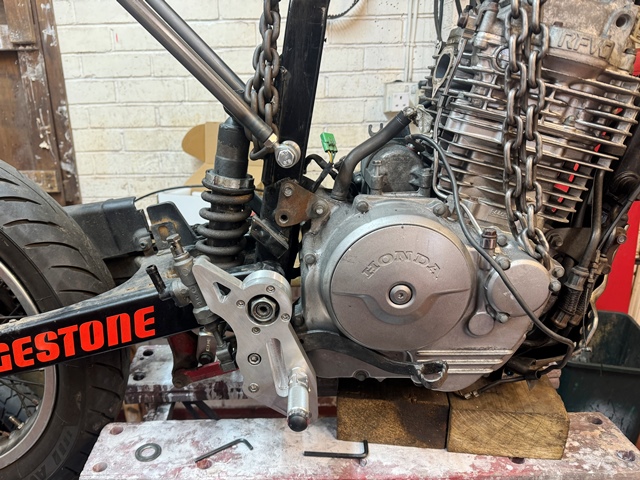
Next job took some thinking about and making… the footrest plates are structural to the frame as they support the ends of the swinging arm. I also wanted to move the pegs forward slightly… here is the result… more chunky than I usually make but they need to be!


__________________
check out my blog! www.jtccc.wordpress.com
buzzer is offline   Reply With Quote
Old 19-01-2024, 10:17 AM   #94
buzzer
Registered User
 
buzzer's Avatar
 
Join Date: Jun 2018
Location: Wolverhampton
Bike: M900
Posts: 392
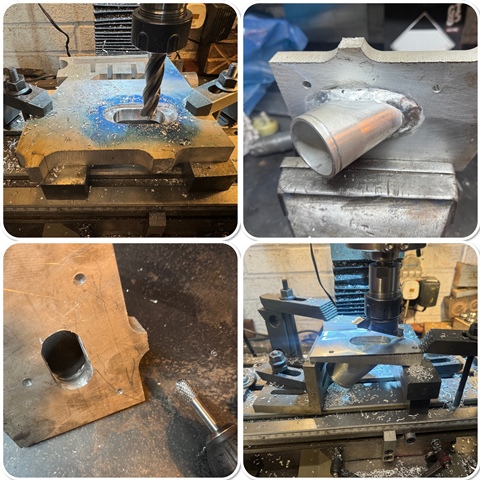
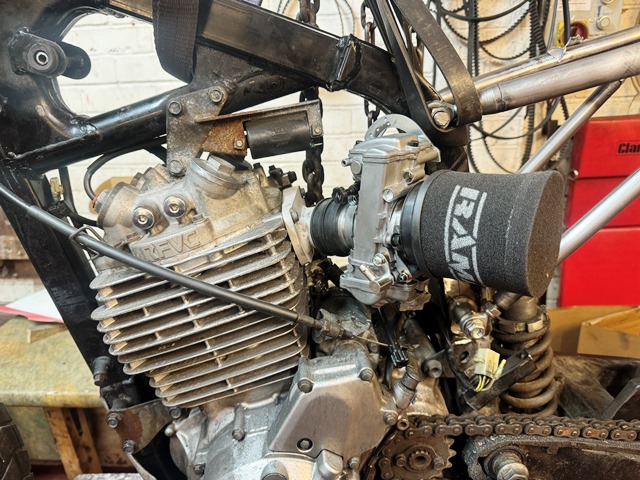
I bought a new Keihin 41mm FCR carb for the bike… while it actually fits on the original manifold I wanted it to stick out a little more, so I decided to make a longer and different manifold. I am still not sure which one to use, but now have the option.

That plate of aluminium is aircraft quality and mills really well... However, the milling chips are small and exceptionally sharp and I have received an official warning that I must shale my overalls off in the garage and remove my shoes before coming into the house :'(


__________________
check out my blog! www.jtccc.wordpress.com

Last edited by buzzer; 19-01-2024 at 10:20 AM..
buzzer is offline   Reply With Quote
Old 19-01-2024, 07:45 PM   #95
350TSS
Too much time on my hands member
 
350TSS's Avatar
 
Join Date: Jan 2013
Location: Shipbourne
Bike: M900
Posts: 1,419
The cable run to the carb might be an interesting interface with the tank?
Not your issue but the join between the headstock tube and the SA pivot tube looks a bit agricultural
350TSS is offline   Reply With Quote
Old 20-01-2024, 11:25 AM   #96
buzzer
Registered User
 
buzzer's Avatar
 
Join Date: Jun 2018
Location: Wolverhampton
Bike: M900
Posts: 392
Quote:
Originally Posted by 350TSS View Post
The cable run to the carb might be an interesting interface with the tank?
Not your issue but the join between the headstock tube and the SA pivot tube looks a bit agricultural
I drilled the spot welds off the cable bracket on the car so I can move it around to have a nice smooth rout for the throttle cable

the joint is a bit agricultural. its that way because its where the oil in frame top tanks meets the empty vertical tube, its a substantial joint
__________________
check out my blog! www.jtccc.wordpress.com
buzzer is offline   Reply With Quote
Old 20-01-2024, 11:33 AM   #97
Kato
Dismantled
 
Kato's Avatar
 
Join Date: Feb 2006
Location: East Molesey
Bike: Multiple Monsters
Posts: 2,223
Lengthening the manifold will of course give more torque / HP in the lower rev range, sacrificing top end performance, assume that would be benificial for the little fut fut Honda
__________________
"Political correctness is just intellectual colonialism and psychological fascism for the creation of thought crime"

Kato is offline   Reply With Quote
Old 21-01-2024, 10:17 AM   #98
350TSS
Too much time on my hands member
 
350TSS's Avatar
 
Join Date: Jan 2013
Location: Shipbourne
Bike: M900
Posts: 1,419
Buzzer: I had forgotten that this genre of Honda engines was dry sump and you reminded me of the pain it was when the cast aluminium oil tank on my XBR developed a hairline crack that only leaked when the oil got really hot, the daily 10 mile commute no problem week in week out, the 50 mile Sunday thrash the back of the bike would come back covered in oil
350TSS is offline   Reply With Quote
Old 21-01-2024, 12:11 PM   #99
utopia
No turn left unstoned
 
utopia's Avatar
 
Join Date: Jun 2010
Location: leicester
Bike: M750
Posts: 4,545
while we're on the subject of oil ....
Be careful at oil change time ... I got caught out the first time I did mine.
The manual for my Dommie (same engine) said that the tank won't take the full 1.9 litres if the system has been fully drained and so you should refill by first putting one litre into the tank, then running the engine at idle for a few minutes before topping up with the remaining 0.9 litres.
I managed to get more than one litre in the tank at first filling so I put a bit more in, thinking it couldn't hurt.
I then ran the engine for a while before topping up.
The mistake that I made was failing to crack open the upper banjo of the feed pipe to the head, to check that there was a flow of oil.
A very few miles later the engine was clearly overheating and closer inspection revealed oil starvation to the head, which was completely wrecked.
I ended up fitting a replacement engine.
Now, I dunno whether the extra oil that I put in at first filling had caused an air lock in the system but I can't think of any other possibility.
So, bizarrely, a little extra oil was a bad thing. Who'd have thought it.
So the moral of the story is twofold ...
Firstly, follow the procedure in the manual exactly.
Secondly, and most importantly (and you would probably have done it anyway .. as should I .. but .....) always crack open the oil feed to check for flow to the head.
I've done many oil changes since and never had a problem but I always hold my breath until I see that reassuring ooze of black gold.

They are surprisingly nice engines actually, and pull strongly when freed up a little via a less restrictive intake and exhaust.
Particularly with a bit of weight loss into the bargain.
utopia is offline   Reply With Quote
Old 27-01-2024, 10:47 AM   #100
buzzer
Registered User
 
buzzer's Avatar
 
Join Date: Jun 2018
Location: Wolverhampton
Bike: M900
Posts: 392
that's great advice Utopia, thank you!

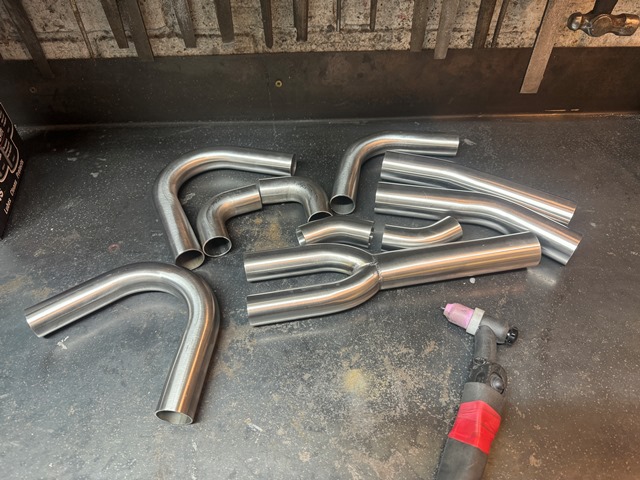
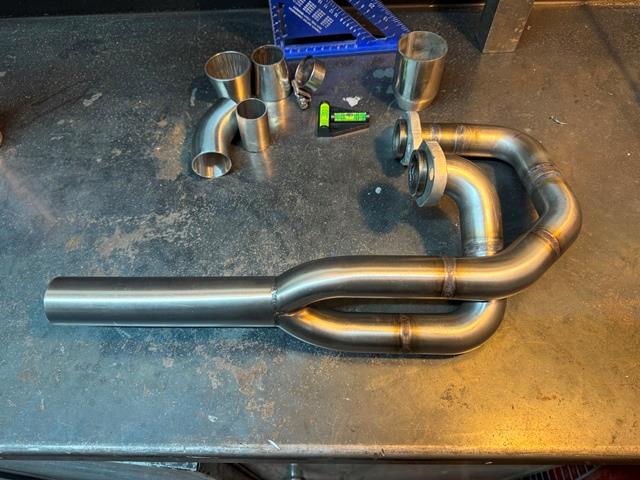
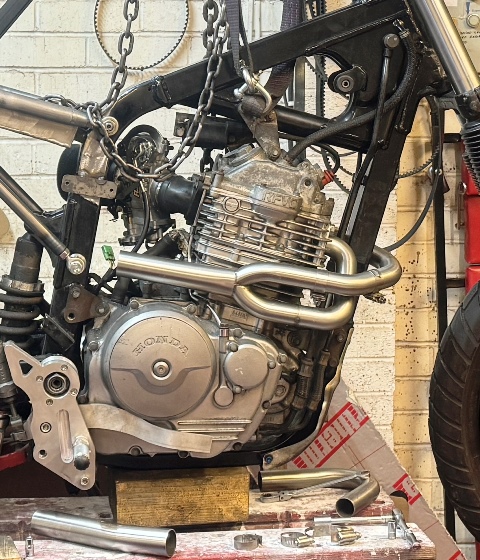
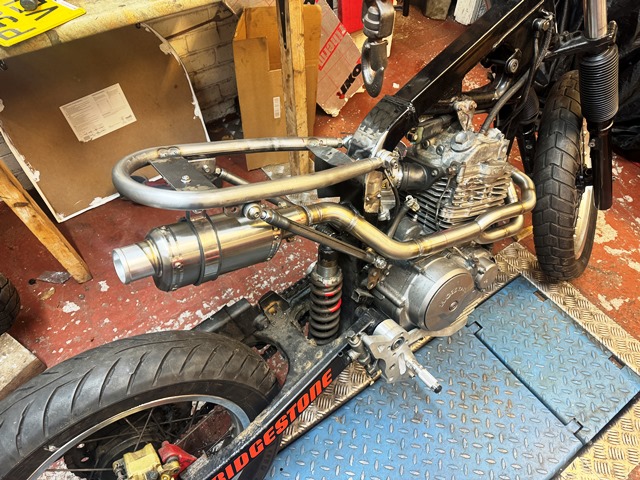
now one of the more satisfying jobs… exhaust fabrication! the original headers were 28mm but its very hard to get any sorts of bends in that diameter so I went up to 32mm, which aesthetically I think looks better. 32mm bends are available in quite a few angles, its just deciding which ones you need, and that’s just an eyeball thing.

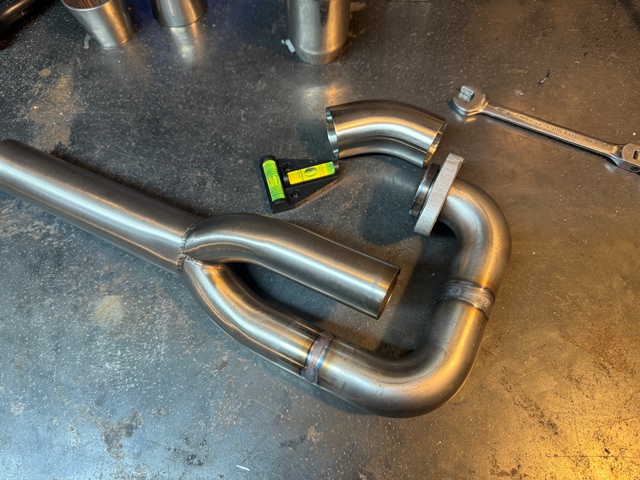
Its not that difficult to make a system, its more time consuming. Cuts are made using a 1mm cutting disk in the angle grinder, and if you wrap masking tape around the cut line you can get it very accurate. then it’s a matter of assembling it together, initially with Jubilee clips. I cut slots in these so I can tack it in situ. A tip about tacking is to double the amps on the welder to what you would use to weld… and then put the tiniest of tacks in place. A tiny tack also has the advantage that it does not pull a gap on the opposite side that you will get if you make big ones. Three tiny tacks are actually very strong, but if you make a mistake, can easily be broken by touching them with the cutting disk. 

Note the 2 way spirit level… this is a VERY useful (and cheap!) way of making sure build lines are correct. If you have the bike vertically (using a long spirit level on the wheel) and horizontal you can place the 2 way level on the bike and tape it there… that becomes your datum. To get it right on this bike I had to drop the stanchions through the yokes as I will be replacing the 19″ front wheel with a 17″ on soon.


__________________
check out my blog! www.jtccc.wordpress.com
buzzer is offline   Reply With Quote
Old 30-01-2024, 07:01 PM   #101
buzzer
Registered User
 
buzzer's Avatar
 
Join Date: Jun 2018
Location: Wolverhampton
Bike: M900
Posts: 392
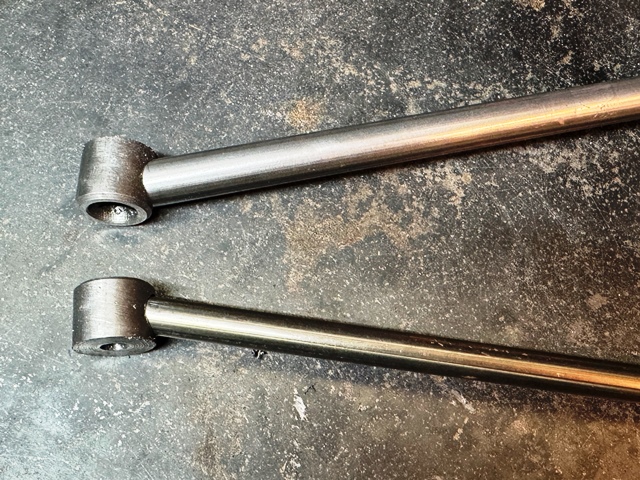
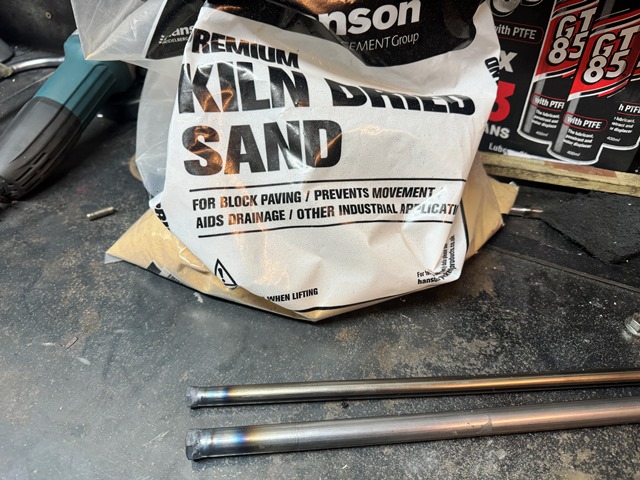
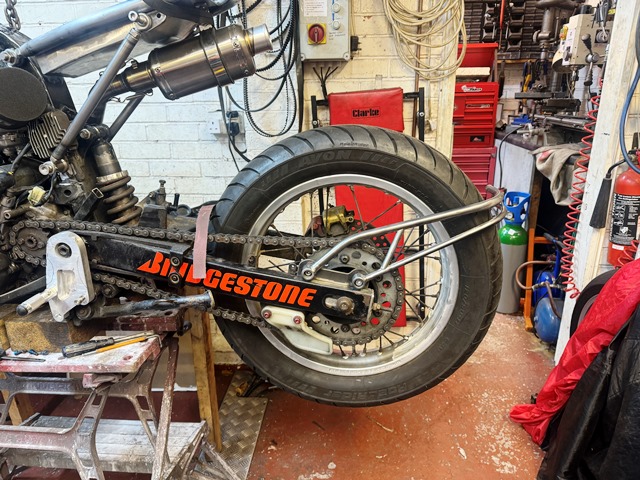
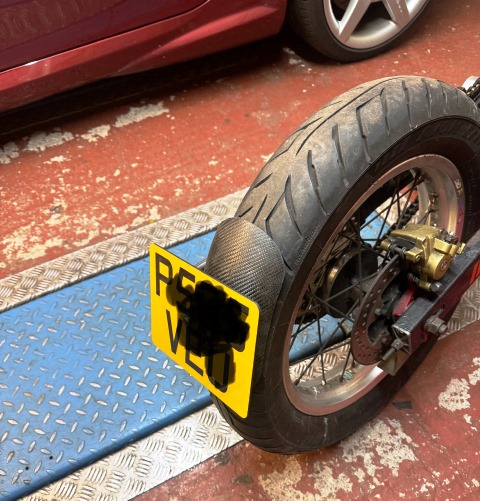
I have agonised over what to do about the number plate… In the end I decided to copy the current crop of bikes that hang it off a bracket off the swinging arm. I quite like how CCM do it so have sort of copied their design. I have used thin wall steel tube which is always difficult to bend, so to prevent kinking I fill the pipe with sand. First I block one end off, and weld a nut on the other. Then its filled with dry sand until its below the threads in the nut. I then hold the tube against the bench grinder and the vibration compacts the sand, so I fill it again. Finally a bolt is tightened onto the sand which compacts it furter.

Doing this means its far less likely to kink as its bent!


__________________
check out my blog! www.jtccc.wordpress.com
buzzer is offline   Reply With Quote
Old 01-02-2024, 11:26 AM   #102
buzzer
Registered User
 
buzzer's Avatar
 
Join Date: Jun 2018
Location: Wolverhampton
Bike: M900
Posts: 392
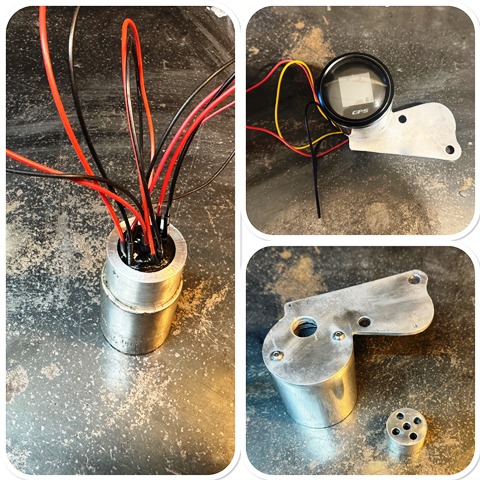
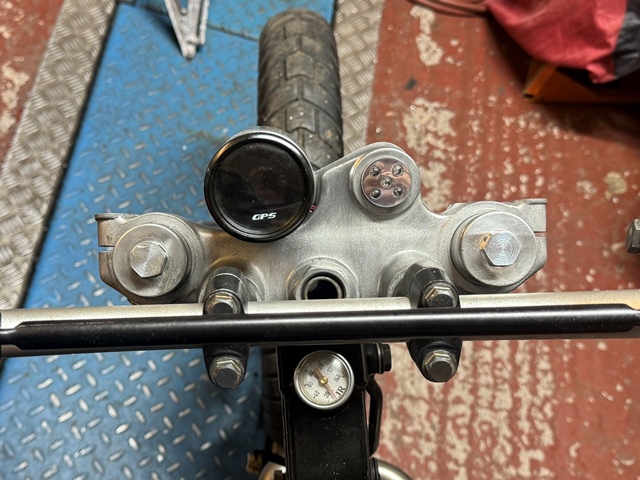
I have used these GPS speedos on a few builds now, it makes things simple, neat and light. The hole for the ignition switch made a handy holder for the warning light LED’s!


__________________
check out my blog! www.jtccc.wordpress.com
buzzer is offline   Reply With Quote
Old 04-02-2024, 10:30 AM   #103
buzzer
Registered User
 
buzzer's Avatar
 
Join Date: Jun 2018
Location: Wolverhampton
Bike: M900
Posts: 392
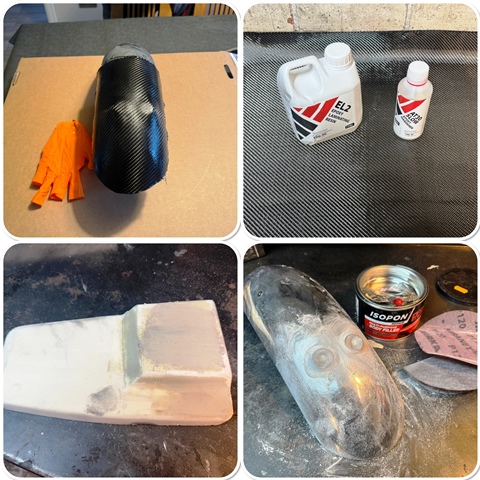
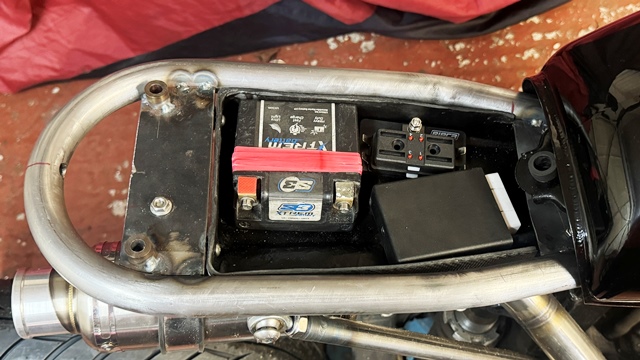
The rear number plate mounting looked OK, but it needed a hugger… I wanted to keep things as light as I could so I decided to try some carbon fibre.. first and probably last time as its a nightmare to work with! I had to buy a meter, so I decided to also make the battery tray as well… That’s currently drying, its nice and light but not that pretty, but its unseen so I will live with it. I used an old mudguard to make the mould and the hugger came out rather well! with what’s left I will probably make a front mudguard, we will see how that turns out, on this one I will try the vacuum bag approach.

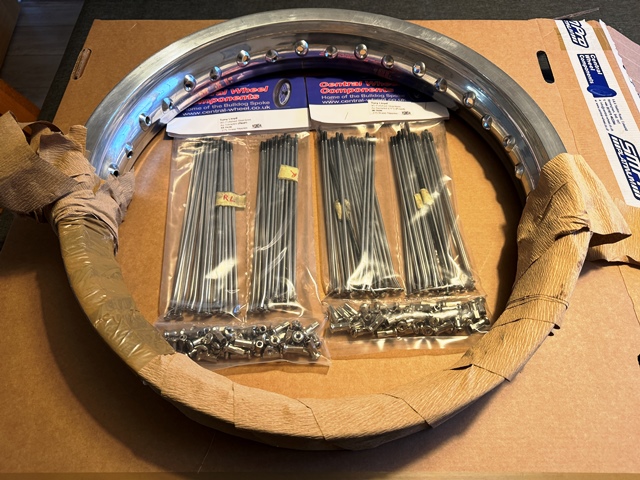
The new 17″ front rim and new stainless spokes have also arrived. Expensive, but you can't have rusty spokes, it spoils a build

there will be a short interlude in updates now as we are off for some sun for three weeks!


__________________
check out my blog! www.jtccc.wordpress.com
buzzer is offline   Reply With Quote
Old 24-02-2024, 09:58 AM   #104
buzzer
Registered User
 
buzzer's Avatar
 
Join Date: Jun 2018
Location: Wolverhampton
Bike: M900
Posts: 392
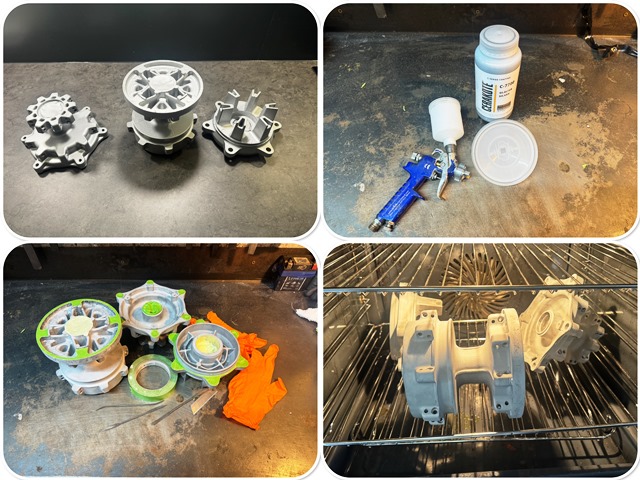
I have wanted to try Cerakote for a while due to the great reports of its durability and finish. So I purchased a pint to see how it went… its not cheap! I read the instructions on their knowledge base and it seemed simple enough so I thought I would start with the wheel hubs.

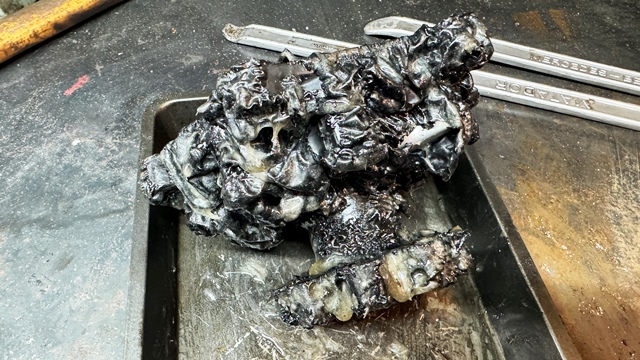
First job was stripping the thick powder coat off, and for this I used some commercial paint stripper. As you can see this makes short work of removing it! the stuff you buy from DIY stores is next to useless for this.

Next prep for the coating. I gave the hubs a good blasting with aluminium oxide grit to give it a key, then cleaned then in hot water with some detergent in. I never use washing up liquid for things like this (or rubbing down paintwork) as it contains silicone, which kind of defeats the object of trying for a clean surface! I then popped them in the warm oven for two reasons…. one is to make sure they are completely dry, and secondly if you mask them while warm, the tape sticks MUCH better. With regard to masking, I put the tape on, and then brush the edges with a riffler file and then you can peel it off perfectly.

Next i gave them a single thin coat of Cerakote. I used a paper strainer as they suggested. Its very thin, but highly pigmented and covers really well. It flash dries in 45 mins, and is handleable in a few hours, but it takes 5 days to fully cure. I was impressed with the ease of application and the finish!
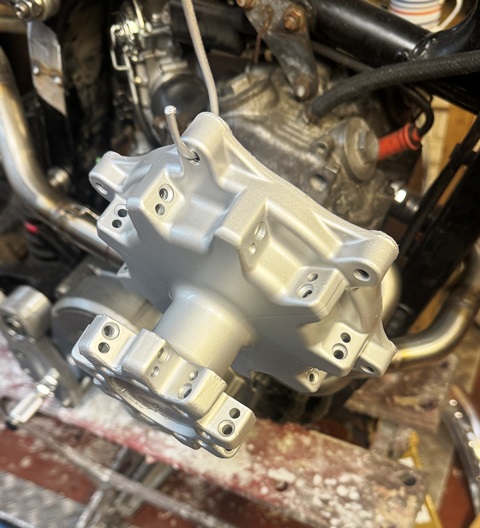


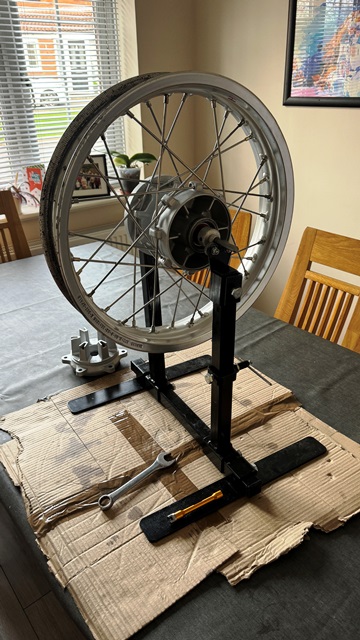
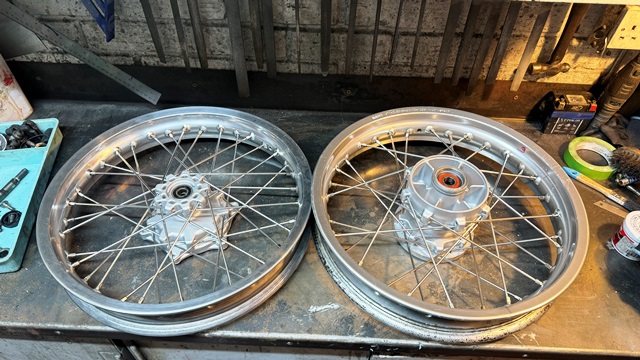
with the hubs now painted it’s time to try something I haven’t done before, and that’s wheel building. I watched a few videos on Youtube and managed to loan a jig off my mate, which actually proved really useful! I got special dispensation to do it on the dining room table as I knew it would take a while and I wanted to be able to sit down!

I was actually surprised how easy it was! I managed to get the correct offset, and up and down and side to side within half a mm.. here they are complete with new bearings and seals.


__________________
check out my blog! www.jtccc.wordpress.com
buzzer is offline   Reply With Quote
Old 25-02-2024, 09:10 AM   #105
buzzer
Registered User
 
buzzer's Avatar
 
Join Date: Jun 2018
Location: Wolverhampton
Bike: M900
Posts: 392
headlight brackets took some thinking about, but I had plenty of time to do it lying in the sun! thank goodness for the Ipad and Ipencil!. I sent the drawing off to the water jet cutters and they cut them out of some nice 25mm plate, they came out well. I also designed them so i could mount the custom made indicators. it will all be polished later as I like to do all the polishing over a few days, horrible and filthy job!


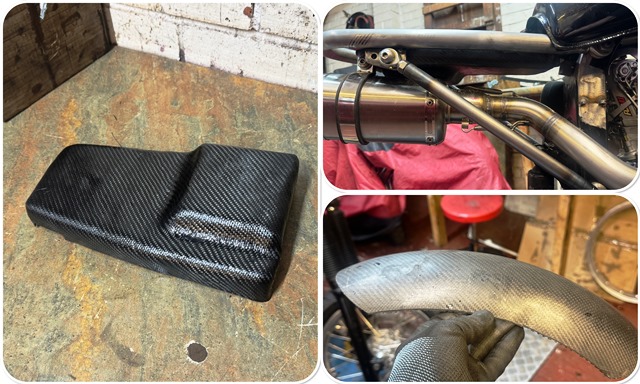
the carbon battery tray came out OK, I initially made an alloy one, but it hung down too low and spoiled the lines, so I made the carbon one stepped so the battery can sit in a recess to the side. its going to be tight with the electrics!
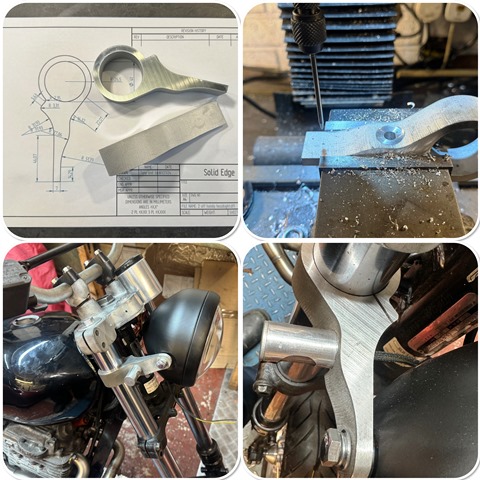


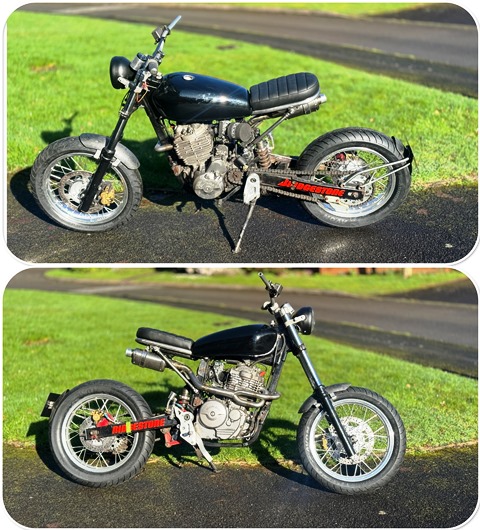
Here it is in profile, not long before i can take it all apart for painting! At this stage its really important to try to mount everything... you don't want to get it all painted/ powder coated and then find you are missing a bracket for say a horn! I also wheeled it around and found that the forks hit the tank... the lock stops are not adjustable on this so I am gong to have to extend them before painting...

I played around for hours on photoshop trying to decide on high, low, beak type mudguard, but decided in the end to go low with a carbon one... with the advantage of a nice fork brace as well. Just ordered some orange fork gaiters, will see what that looks like!

__________________
check out my blog! www.jtccc.wordpress.com
buzzer is offline   Reply With Quote
Reply


Posting Rules
You may not post new threads
You may not post replies
You may not post attachments
You may not edit your posts

BB code is On
Smilies are On
[IMG] code is On
HTML code is Off

Forum Jump


All times are GMT. The time now is 09:00 AM.

vBulletin Skins by vBmode.com. Powered by vBulletin® Version 3.8.3
Copyright ©2000 - 2024, Jelsoft Enterprises Ltd.