UK Monster Owners Club Forum » .: Technical :. » Mods & How To's » Ducati Monster 900 rebuild

Reply
 
Thread Tools Display Modes
Old 30-11-2020, 05:36 PM   #46
buzzer
Registered User
 
buzzer's Avatar
 
Join Date: Jun 2018
Location: Wolverhampton
Bike: M900
Posts: 392
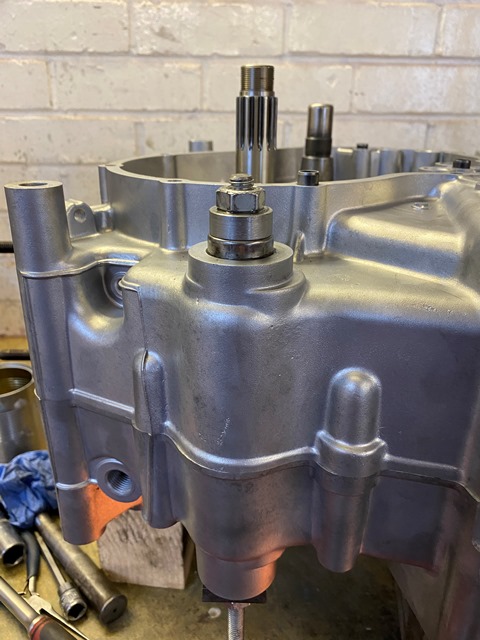
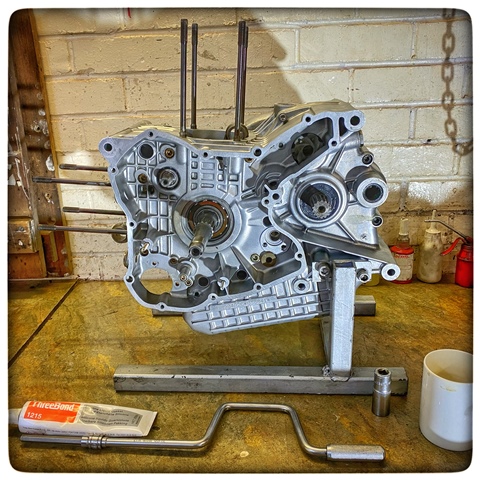
Waiting for the engine spares at the moment, so filled some time doing some bead blasting on bits and pieces… one of the best bits of kit I have is a blast cabinet… It used to live outside at the back of the garage because I could never seal it from escaping media as obviously the air tries to inflate the cabinet… with machines about abrasive dust is a no no… 
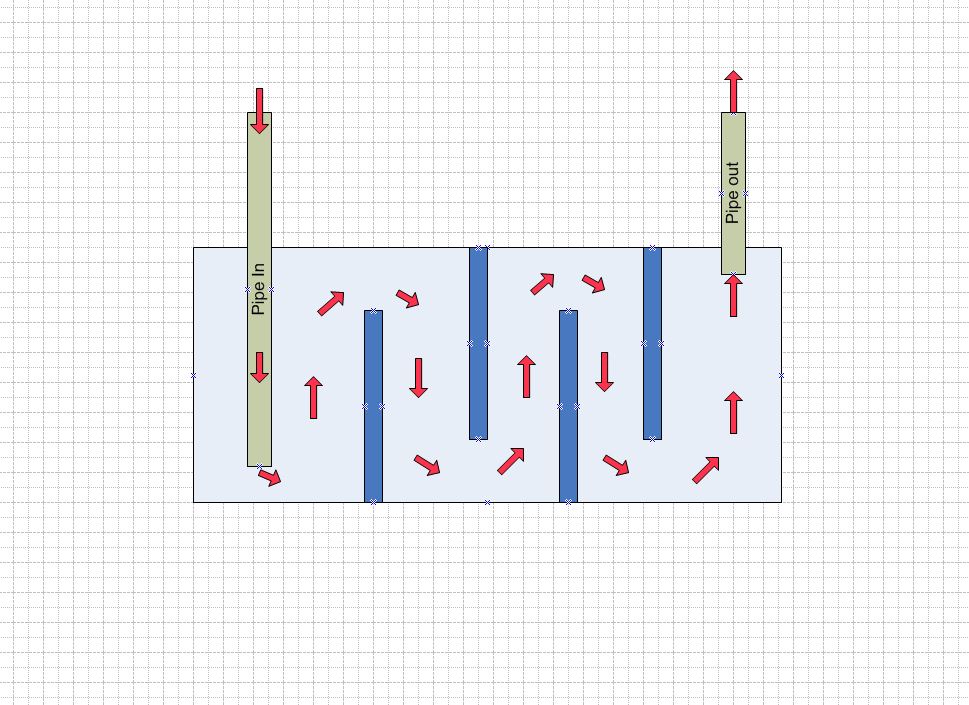
Then I hit on the idea of a centrifugal type filter, which offers no resistance to the air going through it. I made the filter out of an Ikea plastic box and some sink drain pipe, it vents outside…. the principle is as the air is made to twist and turn, the partials of dust and media centrifuge out and drop to the bottom of the chambers… so the first chamber gets the most, the second less and so on. there is hardly anything on the drive and nothing in the workshop. its difficult to get this level of restoration to a part without it… 
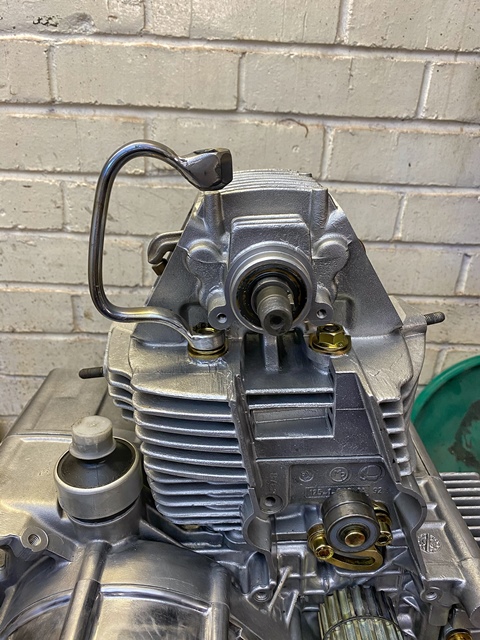
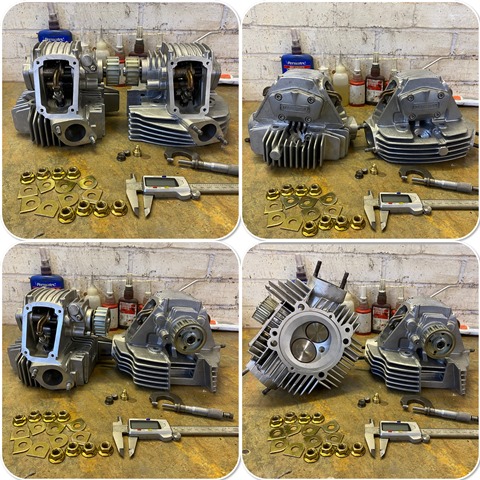
Bead also gives that nice sheen to alloy parts and they don’t pick up dirty finger prints. its very good at resisting oxidation as well, particularly with a coat of ACF-50… 
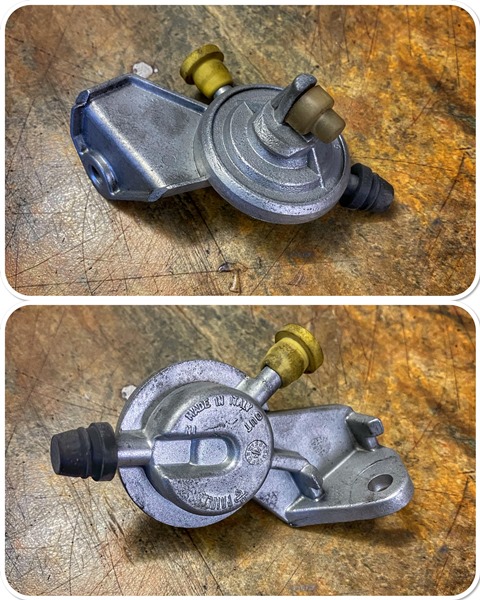
here is the fuel tap.

I used to make a BIG mistake with bead blasting… I could never get a really nice finish except with brand new media… I moaned at the supplier once and he asked me what pressure I blasted at… high as I can I told him.. there is your problem then! you are shattering the glass beads and turning them into sharp dust, hence you get a dull surface! So I went home, filled my cabinet with new bead and got my wife to turn up the pressure as I cleaned a part… soon as it went shiny, that was the best pressure!


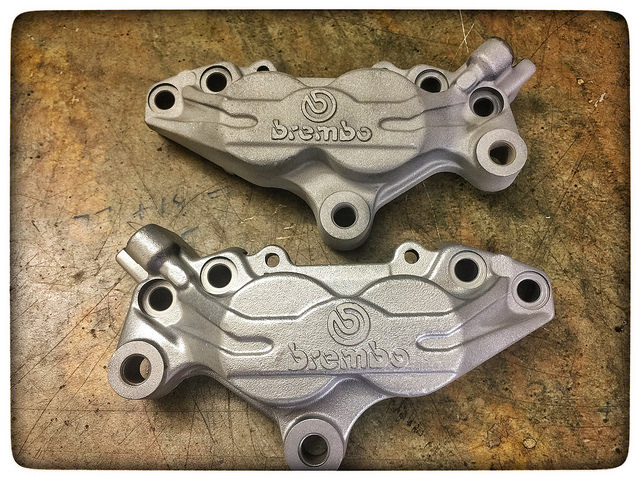
here is the difference old bead high pressure, new bead low pressure!


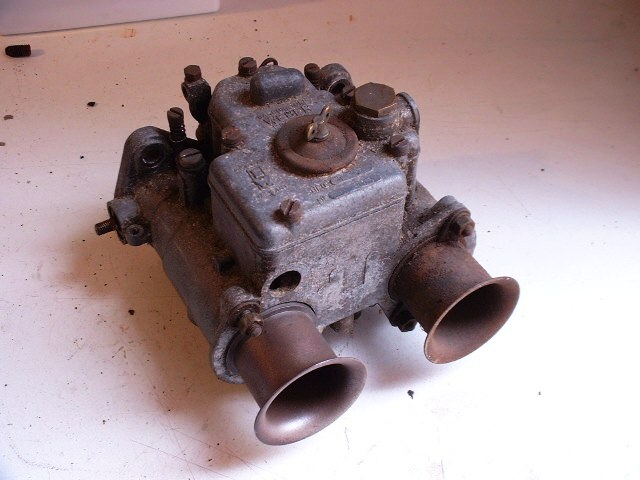
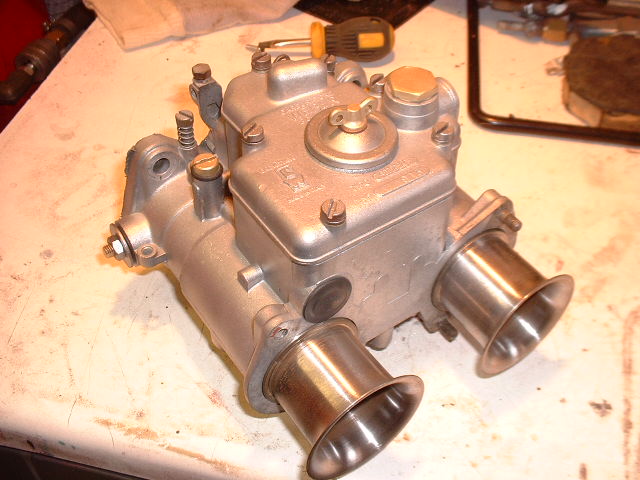
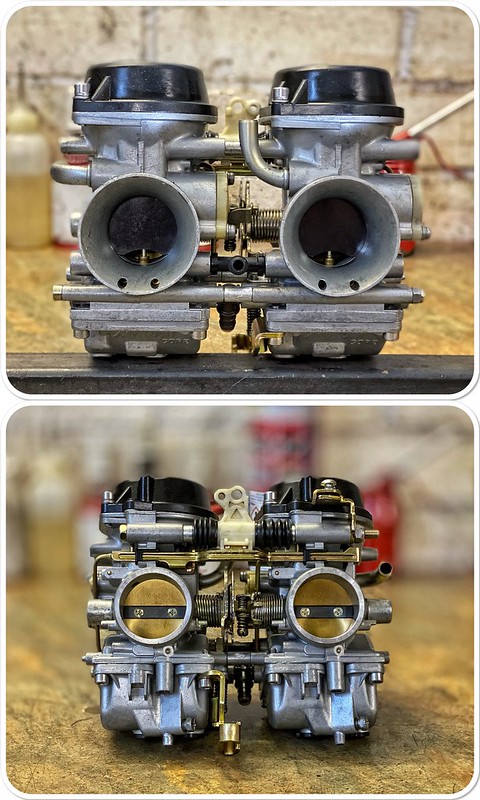
here is a before and after on some weber carbs I rebuilt...


here is how the filter works

buzzer is offline   Reply With Quote
Old 03-12-2020, 08:31 AM   #47
buzzer
Registered User
 
buzzer's Avatar
 
Join Date: Jun 2018
Location: Wolverhampton
Bike: M900
Posts: 392
50 years ago I was an apprentice to the best mechanic I have ever known…Gerry Lampit. He is 89 now and I still visit him… he is still sharp as a razor … He taught me that the hammer was the last resort… that’s always stayed with me. So when I needed to change the swinging arm bearings his words rang in my head


Parts have arrived from Moto Rapido. What a pleasure it is to deal with Craig and Luke, they are SO helpful and knowledgeable! after years of suffering the ignorant local dealer, these guys are the best!


The engine rebuild has started… the cases are together, crank and gearbox shafts shimmed, and I spent a couple of hours making a flywheel holding tool. it worked rather well. Don’t ask me why the hell I welded the bar right across it, had to cut it to get the socket on! senior moment!


buzzer is offline   Reply With Quote
Old 03-12-2020, 04:34 PM   #48
enbee23
Registered User
 
Join Date: Sep 2020
Location: Nairn
Bike: S4r
Posts: 99
Great to see this quality of work. Respect.
enbee23 is offline   Reply With Quote
Old 06-12-2020, 09:50 AM   #49
buzzer
Registered User
 
buzzer's Avatar
 
Join Date: Jun 2018
Location: Wolverhampton
Bike: M900
Posts: 392
the rebuild of the heads is going well… some of the clearances are out though, not surprising as I gave the valves a bit of a grind in and replaced the half rings. I have a little spreadsheet that I put the values in, which calculates everything from there, and also mirrors the measurements in MM rather than the thous I prefer to work in. Old school I know!

Been doing the plating on and off, its time consuming, but I put parts in the bucket, set the timer so I don’t forget, and the magic happens… just a few parts to go…

frame and wheels are back from the powder coater, and its another superb job….


buzzer is offline   Reply With Quote
Old 07-12-2020, 01:25 PM   #50
velosam
Registered User
 
velosam's Avatar
 
Join Date: Sep 2020
Location: Stirling
Bike: M1000ie
Posts: 120
Looking quality!
velosam is offline   Reply With Quote
Old 07-12-2020, 02:22 PM   #51
jerry
Old Git
 
jerry's Avatar
 
Join Date: May 2006
Location: Cricklade
Bike: Multiple Monsters
Posts: 2,816
Your word about gettin swingarm and bearings out is music ,i do for a living offshore and usually I find the puller like yours works easy peasy on most bikes and machines but on my S4 it did not , tried heat, drifts ,bigger hammers , and ended up using 11 tons of hydraulic press pressure to get the little boogers out ,, I put them in 10 years ago on the S4 will lots of clean grease and lube ,,,,ho hum
__________________
MONSTERMAN
jerry is online now   Reply With Quote
Old 08-12-2020, 09:06 AM   #52
buzzer
Registered User
 
buzzer's Avatar
 
Join Date: Jun 2018
Location: Wolverhampton
Bike: M900
Posts: 392
one of the things that has been niggling me is the engine oil pipes and oil cooler lines are badly corroded on the ends… replacements, even aftermarket are a fortune… So I decided to try and plate them… they actually came out rather well!


buzzer is offline   Reply With Quote
Old 08-12-2020, 09:14 AM   #53
Albie
Fanactical volunteer
 
Albie's Avatar
 
Join Date: Oct 2003
Location: Kent
Bike: M900
Posts: 9,030
Quote:
Originally Posted by buzzer View Post
one of the things that has been niggling me is the engine oil pipes and oil cooler lines are badly corroded on the ends… replacements, even aftermarket are a fortune… So I decided to try and plate them… they actually came out rather well!


I said in my build thread you can do this. My friend did his xt500 ones and they are cloth covered braid as to why I had a go. The only thing you will find is the stainless is too gold and it doesnt adhere perfect . I never liked the gold so a light going over the braid with a green nylon scourer bought it back to normal.

Last edited by Albie; 08-12-2020 at 09:46 AM..
Albie is offline   Reply With Quote
Old 08-12-2020, 09:29 AM   #54
350TSS
Too much time on my hands member
 
350TSS's Avatar
 
Join Date: Jan 2013
Location: Shipbourne
Bike: M900
Posts: 1,419
Buzzer: are you using a pump to agitate the mixture, the clear polypipe? and if so are you feeding in air or recirculating the mixture.
My attempts at home brewed plating (just zinc coating with no passivate) whilst always managing to get full coverage always seemed to end up with a grey furry texture which required to be lightly polished with a scotchbrite pad but even then a dullish light grey uneven coloured finish.
350TSS is offline   Reply With Quote
Old 08-12-2020, 01:39 PM   #55
buzzer
Registered User
 
buzzer's Avatar
 
Join Date: Jun 2018
Location: Wolverhampton
Bike: M900
Posts: 392
Quote:
Originally Posted by 350TSS View Post
Buzzer: are you using a pump to agitate the mixture, the clear polypipe? and if so are you feeding in air or recirculating the mixture.
My attempts at home brewed plating (just zinc coating with no passivate) whilst always managing to get full coverage always seemed to end up with a grey furry texture which required to be lightly polished with a scotchbrite pad but even then a dullish light grey uneven coloured finish.
Albie, I didn't do the stainless braid.. in fact I wiped some grease onto it to stop it being plated...


350 TTS, I am using an aquarium pump which just bubble through the water and agitates it.. seems to work quite well... the zinc plate does tend to oxidise quite quick if you don't passivate... even a quick dip seems to work quite well... i did get better results by heating the electrolyte up to 25 degrees...
buzzer is offline   Reply With Quote
Old 08-12-2020, 03:06 PM   #56
Mr Gazza
Lord of the Rings
 
Mr Gazza's Avatar
 
Join Date: May 2013
Location: Norwich
Bike: M900sie
Posts: 5,806
I did a set of oil lines for dacs, with Nickel.

They came out pretty well, but I found the steel to be quite soft on the bent tubes and easy to dig in with the polishing mop. The brass ferrules polished and came up a treat.
I tied them both into U shapes with wire and did both ends at the same time by dangling them in the electrolyte just up to the braid.
One end went quite badly the first time. It stained black and all the plating peeled off like shelling a peanut, but I pepped up the acid pickle and it went well second time around.
Time will tell how durable Nickel is in that exposed position.
__________________
Mr Gazza is offline   Reply With Quote
Old 08-12-2020, 05:29 PM   #57
buzzer
Registered User
 
buzzer's Avatar
 
Join Date: Jun 2018
Location: Wolverhampton
Bike: M900
Posts: 392
Some bolts I just tighten… but critical components I always use a torque wrench… in the past I have used a long series a spanner and calculated the pull I need on a spring balance… but for some reason I could not get the spanner on I have used in the past and its part of an expensive set, so I didn’t want to modify it by grinding… , so had to make a tool… I knew that old spanner and socket would come in one day!

One tip I picked up years ago when I used to build Crossflow race engines was always mark the head nuts/bolts after the first stage torque. I would paint an arrow on them with tippex... then move on to the second stage torque, and then the final stage. then I would check all the arrows were facing the same direction, and if any weren't, I would give them an extra tweak until they did. the rational for this is that it takes much of the varying nut/bolt/washer friction out of the equation and you get an even clamping force.

Of course that's exactly what you do in effect on modern engines, but now in a more refined way with an angle gauge... on a BMW engine I recently worked on the bolts were torqued to 40 NM, then 90 degrees, then another 90... I still put arrows on them! the reason for that is its all to easy to get confused as they need to be puled down in sequence, and there are 20 bolts! its all too easy to forget where you are... and its not like a torque wrench where you give it a click to check! All too easy to give a bolt 90, 90 and another 90, at which point it pings!

buzzer is offline   Reply With Quote
Old 09-12-2020, 12:44 PM   #58
buzzer
Registered User
 
buzzer's Avatar
 
Join Date: Jun 2018
Location: Wolverhampton
Bike: M900
Posts: 392
When people ask me why Ducati bikes are expensive to maintain… I say try doing the valve clearances and adjusting them to the correct specification… its a fiddly job on the bench, let alone in the frame! and this is just the 2V!

buzzer is offline   Reply With Quote
Old 09-12-2020, 04:09 PM   #59
350TSS
Too much time on my hands member
 
350TSS's Avatar
 
Join Date: Jan 2013
Location: Shipbourne
Bike: M900
Posts: 1,419
Dead satisfying when you get them right though
350TSS is offline   Reply With Quote
Old 10-12-2020, 04:53 PM   #60
buzzer
Registered User
 
buzzer's Avatar
 
Join Date: Jun 2018
Location: Wolverhampton
Bike: M900
Posts: 392
Quote:
Originally Posted by 350TSS View Post
Dead satisfying when you get them right though
have to say you are right....

more or less finished the engine build, and also added some of the plated parts to the carbs, they have come up really well..


buzzer is offline   Reply With Quote
Reply


Posting Rules
You may not post new threads
You may not post replies
You may not post attachments
You may not edit your posts

BB code is On
Smilies are On
[IMG] code is On
HTML code is Off

Forum Jump


All times are GMT. The time now is 11:06 AM.

vBulletin Skins by vBmode.com. Powered by vBulletin® Version 3.8.3
Copyright ©2000 - 2024, Jelsoft Enterprises Ltd.