Register | FAQ | Members List | Calendar | Today's Posts | Search | Contact |
|
Registered
Members: 676 | Total Threads: 50,945 | Total Posts: 519,467 Currently Active Users: 557 (0 active members) Please welcome our newest member, Humph |
|
|
Thread Tools | Rate Thread | Display Modes |
18-01-2016, 09:18 PM | #1 |
Guest
Posts: n/a
|
1994 M600 referb (Image heavy)
Hi guys, just a quick one to show you what I've been up to with my M600 I bought at the end of October. I'ts pretty much done, apart from the mudguards to come back from the painters, So I'll pop more up when they come back.
So, here is the Duke when I was riding it back and although it doesn't look in bad nick, the rattle can job on the engine and some of the plastics was horrible! I also realised later that the guy said the cam belts had been done, which once I took over the covers, realised he had totally bull**** me. 1st thing is 1st.....tail tidy. Plastics off, some for paint and some for the bin. Bike was lunging and riding terribly so cleaned the carbs and realised that they were severely under jetted (120s I think). My choke knob snapped so made this temp one. Engine is free!! This went off to the lovely Ducati John to give it a fettle. |
18-01-2016, 09:20 PM | #2 |
Guest
Posts: n/a
|
Swingarm off. The pile in the corner. I then decided to shave off the pillion pegs from the hangers as I don't want the wife on the back of this bike, plus I will be chopping the cans down and wanted to make the whole area look a little more streamlined. Ta,da! |
18-01-2016, 09:21 PM | #3 |
Guest
Posts: n/a
|
In the meantime I had been trying and failing to get the cush bushes out from the rear wheel so I could send all the parts for powder coating.
I eventually bought a blind bearing puller and got the fookers out. A bit of bad news came when I discovered that the dampers in my marzocchi forks were folded into the stanchions, so I had to bin them as the chrome was badly pitted. Luckily I managed to find a second hand pair of 900 forks for less than the cost to have a rechrome done anyway. |
18-01-2016, 09:21 PM | #4 |
Guest
Posts: n/a
|
Paint time!
Here are the 900 forks with the boots painted up. Now it was time to do the can chop as I felt the cans on the bike were just way too long. I decided to shave 6 inches off them to make some nice little stubbies. I am sure the neighbours love me. |
18-01-2016, 09:22 PM | #5 |
Guest
Posts: n/a
|
Then it was time to wrap the headers with some titanium wrap.
Once all that lot was done, the wheels, frame, yokes etc was ready from the powder coaters. Repainted the rotors. Look canny good on the new gold wheel. Much needed recoating of the monoshock spring. I then started the job of putting it all back together. Love these gold caps next to the dar grey. |
18-01-2016, 09:23 PM | #6 |
Guest
Posts: n/a
|
The postie brought me these lush clubman bars. So I chucked them on. The horrid task of putting the electrics back in. and getting the back end back on. Popped a little die cast Italian flag on the front. Had to be done. Engine came back from John and cases etc back on. I know, I know, I should have cleaned and painted the engine BEFORE I took it to John. As you can see, it's a bit of a mess. |
18-01-2016, 09:24 PM | #7 |
Guest
Posts: n/a
|
After a lot of cleaning though, I started to come up well. I then remasked all the freshly painted bits and began to respray the engine with some HT matt enamel. After several coats, it came out well. |
18-01-2016, 09:24 PM | #8 |
Guest
Posts: n/a
|
I then got my mate Dale to give me a hand lowering the lump off the table and onto the scissor stand so I could lift it into the frame. We managed to get the trellis bolts in no problems but the swingarm would not go on with the washers. After a quick check it was apparent that I needed to skim back the coating on the mating area of the swingarm.....I should have checked this earlier. Anyway 2 mins with the dremel and the swingarm and washers popped into place easy as pie.
Unfortunately, I had to take the clubmans off as I had decided to let the wife have a share of this bike so she can complete her CAT A this year. Old bars painted up and back on. Exhaust system goes back together. Battery and carbs back in. Tank comes back from the painters. After I popped the tank back on and boy does it look nice, I wrapped the grips with some flat leather strap. Then put some yellow HT leads on to complement the gold. Getting there. |
18-01-2016, 09:25 PM | #9 |
Guest
Posts: n/a
|
Wee bit of gold paint on the forks.
That's it so far chaps! Hope you all like it and sorry about having to spread the posts out like this. Didn't realise I would have to. |
18-01-2016, 09:29 PM | #10 |
Guest
Posts: n/a
|
Blinkin' spectacular !!!!!
|
18-01-2016, 09:38 PM | #11 |
Guest
Posts: n/a
|
Cheers mate!!!
|
18-01-2016, 09:42 PM | #12 |
Guest
Posts: n/a
|
an amazing transformation pal, hope your proud.
|
18-01-2016, 10:23 PM | #13 |
Anglo-Saxon Warrior
Join Date: Aug 2002
Location: North Yorkshire
Bike: M900
Posts: 2,485
|
Very nice refresh, a bit of a JPS colour scheme.
Yorkie
__________________
NO ICE, GUN IT! |
18-01-2016, 10:50 PM | #14 |
Registered User
Join Date: Mar 2010
Location: Beachtown
Bike: M900
Posts: 2,188
|
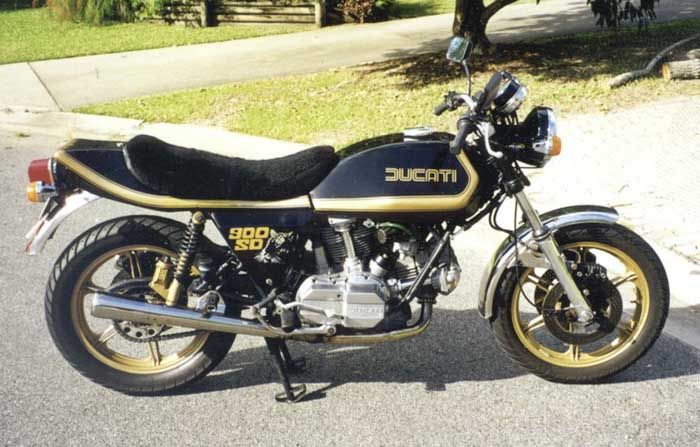
More like a bit of a Darmah colour scheme:
I think you've done a great job, the stripped down look with the black and gold suits it- after all, who would want a yellow one?? If I were being super critical I would have had the tank decal put on horizontally as per the original but that is purely personal taste. Source another front disc and caliper to even up the forks and it will be finished!!
__________________
You're perfect, yes, it's true- But without me you're only you! |
19-01-2016, 12:15 AM | #15 |
Guest
Posts: n/a
|
Cheers chaps!
Flip, I agree with the decal but the painter put the decal on and I thought it would have been put in the same place as the original. Good shout on the second disc and caliper. That'll definitely be a future addition. Oh aye and you can't knock the JPS colours. |
|
|