UK Monster Owners Club Forum » .: Technical :. » Mods & How To's » Ducati Monster 900 rebuild

Reply
 
Thread Tools Display Modes
Old 09-01-2021, 05:00 PM   #121
slob
.
 
slob's Avatar
 
Join Date: Jul 2003
Location: East London
Bike: Multiple Monsters
Posts: 9,732
I remember cleaning up and painting one for Jim, not 100% what bit it was...


not the top clip,
if you look closely you can see the second guide below the caliper
(pre restoration photo)

also there's a clip that looks similar that lives under the r/h rear hugger mounting bolt (stein-dinse m900 '98 table30/#21)

Last edited by slob; 09-01-2021 at 06:10 PM.. Reason: found a pic
slob is offline   Reply With Quote
Old 09-01-2021, 06:28 PM   #122
Albie
Fanactical volunteer
 
Albie's Avatar
 
Join Date: Oct 2003
Location: Kent
Bike: M900
Posts: 9,034
Quote:
Originally Posted by buzzer View Post
thanks guys... its just 3 and 9 now... 3 is too small for gear or brake lever, and those are already on....
Does 9 go on the rear brake plate as a guide to keep it aligned

It looks different from the year 93 but yours is 97

https://www.stein-dinse.biz/eliste/e...22db783a&lg=en

Last edited by Albie; 09-01-2021 at 06:32 PM..
Albie is offline   Reply With Quote
Old 10-01-2021, 09:09 AM   #123
buzzer
Registered User
 
buzzer's Avatar
 
Join Date: Jun 2018
Location: Wolverhampton
Bike: M900
Posts: 397
I am getting there, thanks guys...

number 3 is a bolt that goes through the rear suspension loop where it connects to the swinging arm... I forgot, I had to cut one off to get it out. I have used some low head stainless ones in there...

as for 9, still looking. it has a 6mm hole, and one end looks like it goes into one of the rubber grommets ... I will keep looking!
buzzer is offline   Reply With Quote
Old 10-01-2021, 01:56 PM   #124
Albie
Fanactical volunteer
 
Albie's Avatar
 
Join Date: Oct 2003
Location: Kent
Bike: M900
Posts: 9,034
Quote:
Originally Posted by Darkness View Post
Just that one....? ��
Number 17 isn't your part number 9 is it Tony
Albie is offline   Reply With Quote
Old 13-01-2021, 02:27 PM   #125
buzzer
Registered User
 
buzzer's Avatar
 
Join Date: Jun 2018
Location: Wolverhampton
Bike: M900
Posts: 397
Time to start up soon… I am always aware that a rebuilt engine needs oil at first start-up, and while I always fill the filter before I screw it on, the oil cooler and pipes are empty, as are the oil ways, and the oil pump. I have therefore always used this method of giving the engine the best start in life I can and inject some oil into the system via the oil pressure switch port.

I used to do it on many of the race engines I have built in the past and it was always satisfying to take the oil filler cap off and see oil seeping out the rocker shafts or cam bearings. Either way I always turn it over until the oil warning light goes out… which unless you prime the oilways can be a worrying amount of time!

buzzer is offline   Reply With Quote
Old 15-01-2021, 11:47 AM   #126
buzzer
Registered User
 
buzzer's Avatar
 
Join Date: Jun 2018
Location: Wolverhampton
Bike: M900
Posts: 397
well it started first time! I screwed in my oil pressure gauge and it went up straight away… sounded nice! I like to start builds on a dummy tank if I can…. I made that tank over 40 years ago, its started a few engines! its still got an original laverda tap on it!


buzzer is offline   Reply With Quote
Old 15-01-2021, 12:00 PM   #127
Moco1961
Guest
 
Posts: n/a
Nice job once again Tony, not far to go now
  Reply With Quote
Old 15-01-2021, 12:07 PM   #128
buzzer
Registered User
 
buzzer's Avatar
 
Join Date: Jun 2018
Location: Wolverhampton
Bike: M900
Posts: 397
Quote:
Originally Posted by Moco1961 View Post
Nice job once again Tony, not far to go now
yep, not much left... painting next, but its a bit cold for that... may have to wait a while...
buzzer is offline   Reply With Quote
Old 28-01-2021, 03:57 PM   #129
buzzer
Registered User
 
buzzer's Avatar
 
Join Date: Jun 2018
Location: Wolverhampton
Bike: M900
Posts: 397
been out of action for almost 2 weeks... strained my left hand, taking off a lid off a jar of all things, so thought it better to rest it... getting there now... sigh of getting older I guess...

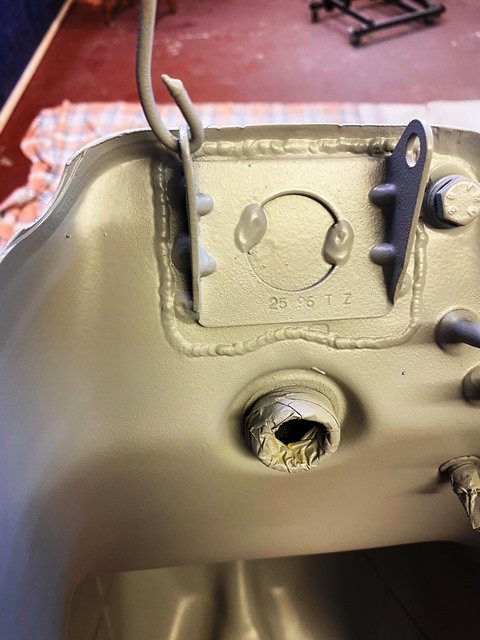
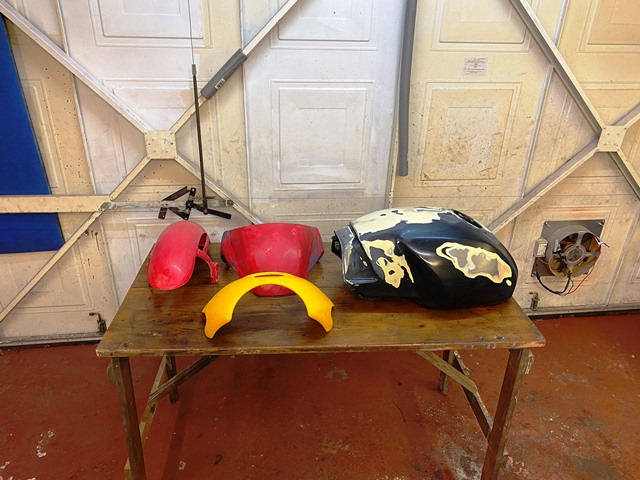
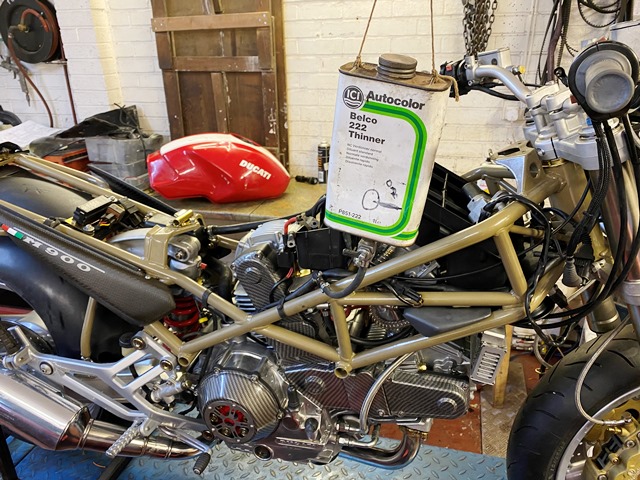
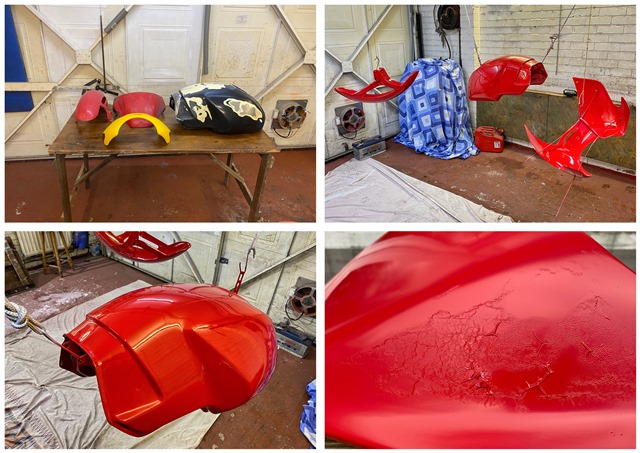
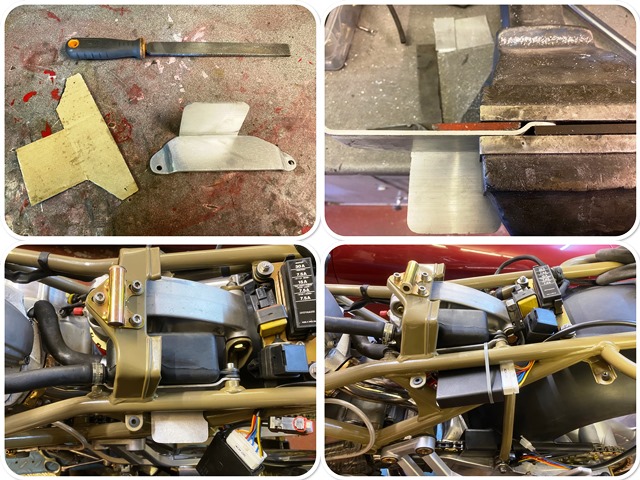
Started preparing the tanks and bodywork for painting… I know the tank hinge on the monster is a weak point, and it did show evidence of being strained… I didn't want to paint the tank and find out it soon failed, so I decided to take the bracket off and strengthen the area and TIG weld the bracket back on… I normally have tanks blasted but the guy who does it for me is off with Covid at the moment, so it may be a while before he is back, and I don’t trust anyone else after having some shocking jobs done in the past….


buzzer is offline   Reply With Quote
Old 29-01-2021, 04:05 PM   #130
buzzer
Registered User
 
buzzer's Avatar
 
Join Date: Jun 2018
Location: Wolverhampton
Bike: M900
Posts: 397
things didn’t go well with the painting… the seat cowl had rattle can paint on it by the look of it... and it reacted badly to the base coat. going to have to do it all again. the other parts came out well though… two coats of clear on the mudguard and fairing, one coat on the tank before I put the decals on and then hit it with one and a half coats…

buzzer is offline   Reply With Quote
Old 01-02-2021, 10:17 AM   #131
buzzer
Registered User
 
buzzer's Avatar
 
Join Date: Jun 2018
Location: Wolverhampton
Bike: M900
Posts: 397
Painting is all finished and I am happy with the results... I love the way 2k just comes out with a gloss from the gun... here is a 25 second video...

https://www.youtube.com/watch?v=fgFTyJd4fQs
buzzer is offline   Reply With Quote
Old 04-02-2021, 04:36 PM   #132
buzzer
Registered User
 
buzzer's Avatar
 
Join Date: Jun 2018
Location: Wolverhampton
Bike: M900
Posts: 397
One of the few fabrication jobs I have done on this bike… I have decided to fit an ignitech ignition… Most people seem to fit them next to a smaller battery, or move the coils over, but I wanted to keep the unit away from the heat of the engine… So I made a bracket to fit it under the LH side panel. it just fits nicely…

buzzer is offline   Reply With Quote
Old 05-02-2021, 08:43 AM   #133
Darren69
Transmaniacon MOC
 
Darren69's Avatar
 
Join Date: Sep 2013
Location: Sutton In Ashfield
Bike: Multiple Monsters
Posts: 6,085
Quote:
Originally Posted by buzzer View Post
One of the few fabrication jobs I have done on this bike… I have decided to fit an ignitech ignition… Most people seem to fit them next to a smaller battery, or move the coils over, but I wanted to keep the unit away from the heat of the engine… So I made a bracket to fit it under the LH side panel. it just fits nicely…

Good idea and looks very neat too, and for the same reasons I put my PCIII unit under the seat because the standard way by the battery would get engine heat.

Could you not use velcro pads for fixing it to the plate? I fear that cable tie is gonna fret and rub your nice new frame paint down to the bare metal.
__________________
Roast Beef Monster!

Termignoni and Bucci - Italian for pipe and slippers!

S4 Fogarty, S4R 07T, 748, Series 1 Mirage
Darren69 is offline   Reply With Quote
Old 05-02-2021, 09:43 AM   #134
buzzer
Registered User
 
buzzer's Avatar
 
Join Date: Jun 2018
Location: Wolverhampton
Bike: M900
Posts: 397
Quote:
Originally Posted by Darren69 View Post
Good idea and looks very neat too, and for the same reasons I put my PCIII unit under the seat because the standard way by the battery would get engine heat.

Could you not use velcro pads for fixing it to the plate? I fear that cable tie is gonna fret and rub your nice new frame paint down to the bare metal.
i agree, you know when you do something and you know its not right... i will use some double sided tape, not enough room for the velcro, its tight in there
buzzer is offline   Reply With Quote
Old 05-02-2021, 09:47 AM   #135
Mr Gazza
Lord of the Rings
 
Mr Gazza's Avatar
 
Join Date: May 2013
Location: Norwich
Bike: M900sie
Posts: 5,936
That's where the rear coil is mounted on my M900ie. Neat job, I'm sure the cable tie is not permanent.

Regarding the engine heat; I'm not sure it will always be any cooler than by the battery?
It's logical to think that it's going to be warm straight above the engine in the vee, in the hollow of the tank, but it does receive a cooling blast when on the move that carries most of the heat away, obviously this is going to build up when in traffic.
But that heat is blown rearwards under the seat and exits heading over the hugger and out sideways. So that area is equally, if not more warm than the battery compartment when on the move. In traffic if still gets the heat from the rear exhaust, probably to a greater degree (I know!) than from the engine in the battery compartment?

Some years back we had a Tunnel run one HOT June night in London. What an unbelievable night with the traffic gridlocked and progress only possible by insane filtering. The water cooled bikes showed all the bars on the temp gauges and we had to stop for a cool off.
In the very early hours and the slightly cooler air Grumpy and I stopped to fill up and buy a stop/tail bulb. When I lifted the seat to change the bulb I was hit by a wave of heat from the back of the engine. I couldn't have wanted a more graphic demonstration of where the heat goes than that!
I'm sure that the unit will be absolutely fine where it is and even beside the battery for that matter, but if heat really was an issue then probably a location further forward would be better.. I'm sure there is a little space in front of the airbox?
Has anyone thought of putting it IN the airbox through a grommet? Always a supply of cold air in there whilst the engine is running?
__________________

Last edited by Mr Gazza; 05-02-2021 at 09:54 AM..
Mr Gazza is offline   Reply With Quote
Reply


Posting Rules
You may not post new threads
You may not post replies
You may not post attachments
You may not edit your posts

BB code is On
Smilies are On
[IMG] code is On
HTML code is Off

Forum Jump


All times are GMT. The time now is 06:48 PM.

vBulletin Skins by vBmode.com. Powered by vBulletin® Version 3.8.3
Copyright ©2000 - 2024, Jelsoft Enterprises Ltd.