UK Monster Owners Club Forum » .: Technical :. » Mods & How To's » Ducati 1000 DS custom build

Reply
 
Thread Tools Display Modes
Old 25-02-2024, 11:02 AM   #106
walkingpictures
preneolithic frebie
 
walkingpictures's Avatar
 
Join Date: Sep 2002
Location: Cambridge
Bike: S4Rs
Posts: 329
Is there no end to your talents Tony!!

The build is coming along nicely,thanks for the update.
walkingpictures is offline   Reply With Quote
Old 02-03-2024, 11:44 AM   #107
buzzer
Registered User
 
buzzer's Avatar
 
Join Date: Jun 2018
Location: Wolverhampton
Bike: M900
Posts: 404
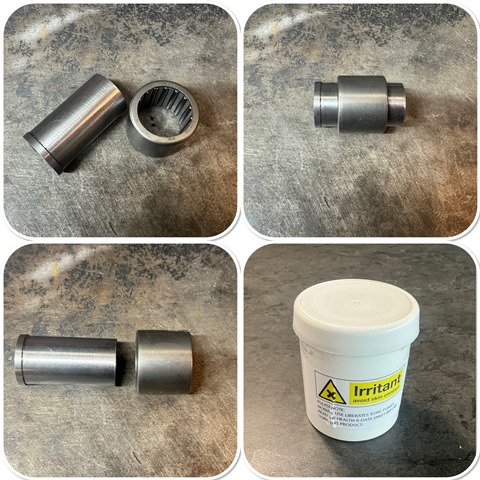
one of the few items on the bike that needed real attention was the swinging arm bush and needle roller bearing. it was badly rusted and seized… I checked and the bush is no longer available. I made one out of good quality steel, and case hardened it several times to build up the depth of the hardened layer. I also did a test piece and was pleased that I could not touch it with a file! I have not done case hardening for a LONG time!


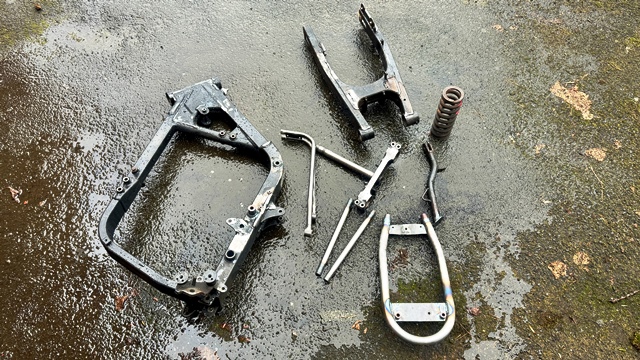
I finished welding up the frame and parts. Where I had modified the frame tubes I put an internal tube so it didn’t crush it when I tightened the bolts, then I welded the support bushes on. Then it was off to the powder coaters, along with a big box pf parts to be plated.


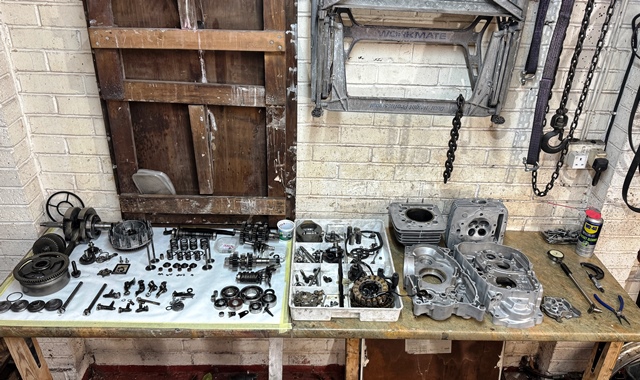
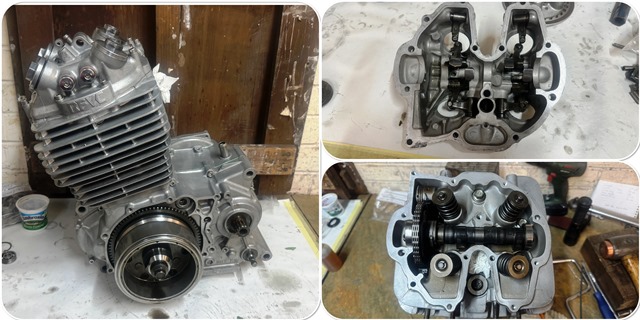
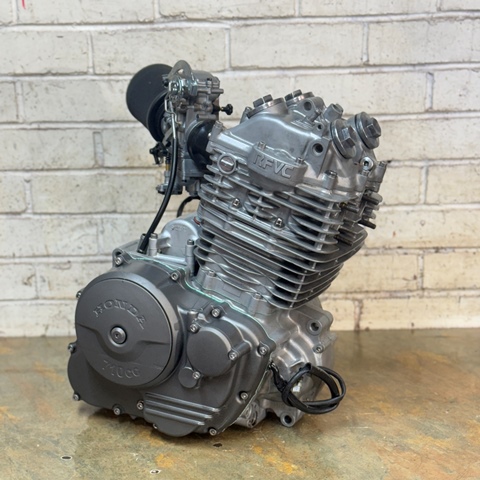
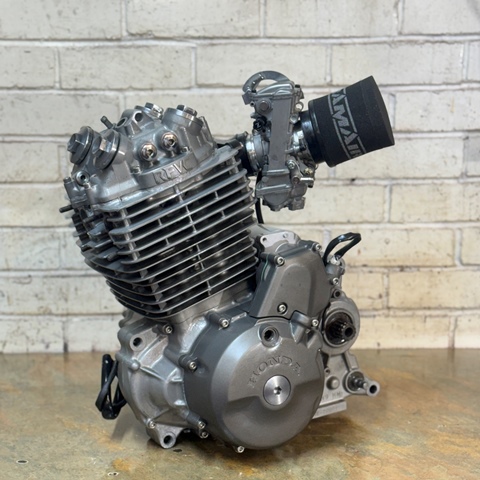
Its always stressful pulling an engine apart… you never know what you are going to find! I was really pleased as it came apart. there is no discernable wear on the bore, all bearings are nice and smooth, so its just gaskets, seals, and a new cam chain. I can see why these engines do mega miles, it’s VERY well built!


__________________
check out my blog! www.jtccc.wordpress.com
buzzer is offline   Reply With Quote
Old 02-03-2024, 01:09 PM   #108
utopia
No turn left unstoned
 
utopia's Avatar
 
Join Date: Jun 2010
Location: leicester
Bike: M750
Posts: 4,561
I believe there is an automatic valve lifter which operates on one valve during starting.
Mine has been ok but I have heard others claiming that these can malfunction.
Not sure if this is a correct diagnosis or not but it might be worth checking closely while you've got the engine apart.
Also worth checking that the short oil feed line from the pump hasn't collapsed. Mine looked dodgy so I replaced it when I had the aforementioned oil feed problem.

And yes, I too haven't done case-hardening for a VERY long time.
utopia is offline   Reply With Quote
Old 05-03-2024, 12:30 PM   #109
buzzer
Registered User
 
buzzer's Avatar
 
Join Date: Jun 2018
Location: Wolverhampton
Bike: M900
Posts: 404
Quote:
Originally Posted by utopia View Post
I believe there is an automatic valve lifter which operates on one valve during starting.
Mine has been ok but I have heard others claiming that these can malfunction.
Not sure if this is a correct diagnosis or not but it might be worth checking closely while you've got the engine apart.
Also worth checking that the short oil feed line from the pump hasn't collapsed. Mine looked dodgy so I replaced it when I had the aforementioned oil feed problem.

And yes, I too haven't done case-hardening for a VERY long time.
thanks. I had read about this and one of the causes of malfunction is turning the engine backwards, which bends the pin and then it no longer works. Mine seemed OK and free...

Just painted the pipes... I will check, agin thanks


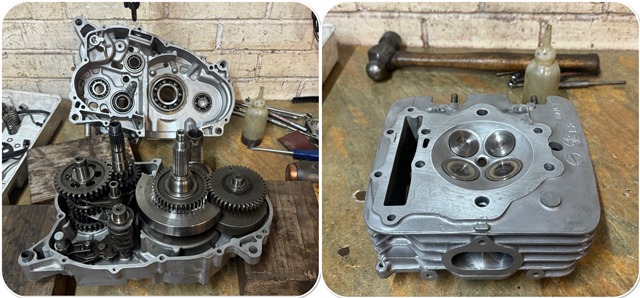
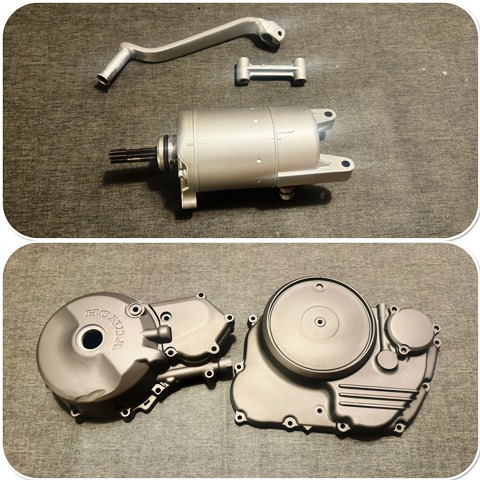
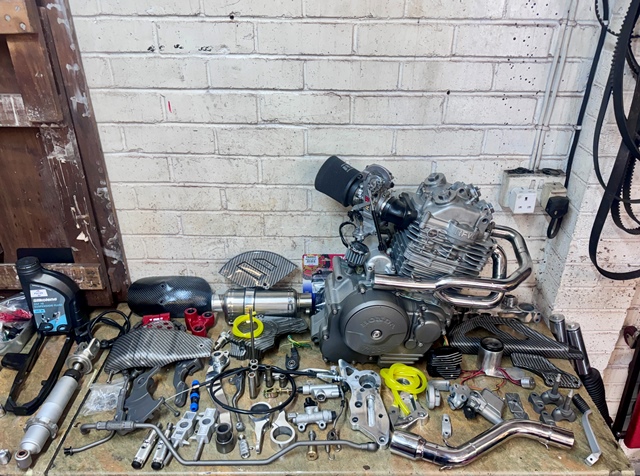
the engine build is well underway…its a nice and simple engine to build, I do like the way honda gets all the tolerances spot on! While I was on I polished the ports, and matched the inlet manifold to the head. I also did a bit more Cerakote, and I have to say its easy to apply, and gives a superb finish, I would say that its easily up to factory standard! I have used the air dry titanium colour on the side case for a bit of contrast and will also be using this on the oil lines.


__________________
check out my blog! www.jtccc.wordpress.com
buzzer is offline   Reply With Quote
Old 05-03-2024, 12:41 PM   #110
buzzer
Registered User
 
buzzer's Avatar
 
Join Date: Jun 2018
Location: Wolverhampton
Bike: M900
Posts: 404
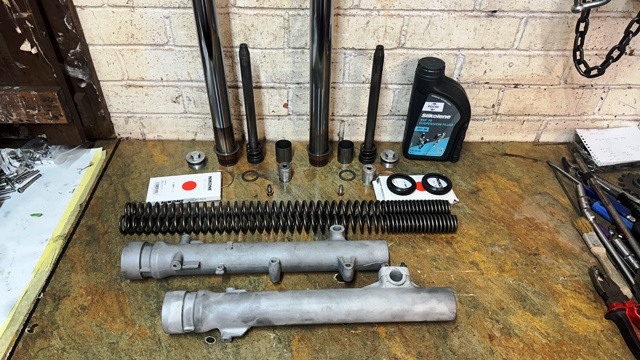
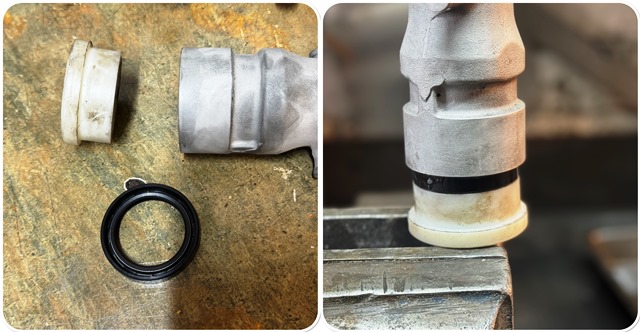
Onto rebuilding the forks, boy the oil was black in there! they were all OK though so new seals and dust covers, and some new oil. I often hear of people replacing fork seals and still having them leak afterwards…. This is often because people install the seals by tapping them in with a punch! this invariably damages the seal lip, hence they leak. the best way to install them is with a nylon collar supported in the vice… that way you can tap them in nice and square and get then seated on the bottom of the land.


__________________
check out my blog! www.jtccc.wordpress.com
buzzer is offline   Reply With Quote
Old 07-03-2024, 07:01 PM   #111
buzzer
Registered User
 
buzzer's Avatar
 
Join Date: Jun 2018
Location: Wolverhampton
Bike: M900
Posts: 404
The engine is all back together now and I am pleased with the results. There will be a break in my posts for a while as I am off for a bit more sun!


__________________
check out my blog! www.jtccc.wordpress.com
buzzer is offline   Reply With Quote
Old 16-03-2024, 03:57 PM   #112
buzzer
Registered User
 
buzzer's Avatar
 
Join Date: Jun 2018
Location: Wolverhampton
Bike: M900
Posts: 404
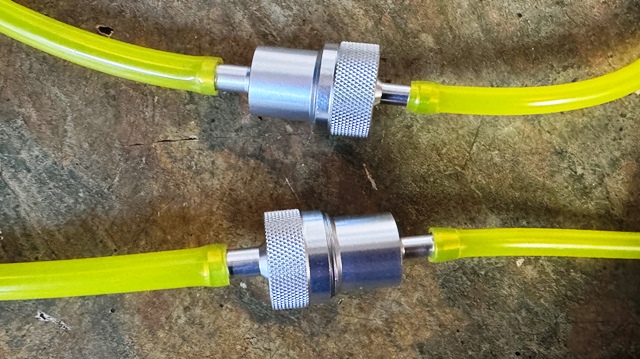
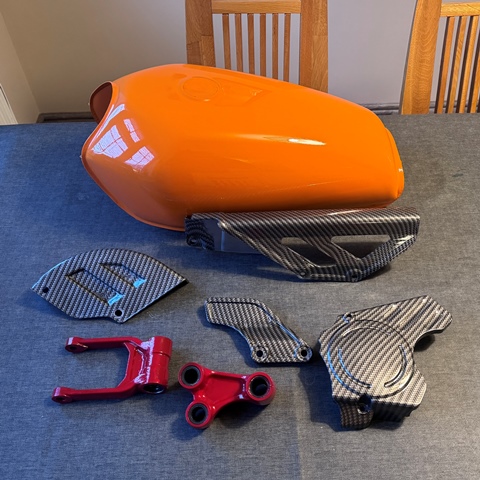
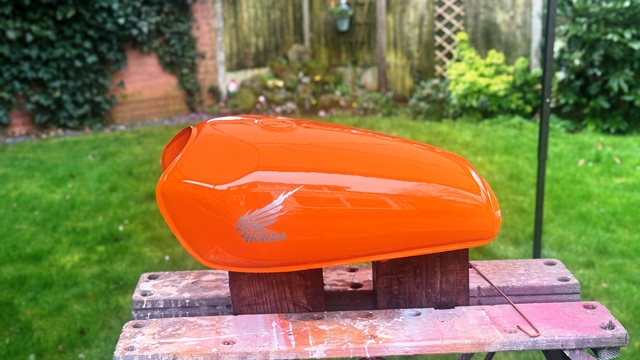
painting day… I debated on painting some of the parts satin black, but I actually like the fake carbon, plus its very durable. The fuel filters came as well.. I bought an 8mm and a 6mm one and swapped the parts over to compensate for the fact the fuel tap is a smaller pipe than the carb!


I was going to put a standard Honda decal on the tank, but then I saw these and liked them… not from the usual supplier, but the seller also sent me some samples so i could test the compatibility with the laquer. It was fine thank goodness. When painting over decals there are a few tips… first off I always do a first coat of laquer and let it dry, i never put them on the base coat. then I wet sand with 1000 wet and dry and then stick the decals in place. Now the important bits… Always wipe the area with panel wipe… this is for two reasons. Firstly, there is always some adhesive on the edge of the decal, and secondly they often have silicon on them and that makes the paint cess. I always give a mist coat over the decal and let it tack off, the reason for this is if you hit it with a full coat first you end up with runs off the horizontal edges of the decal.

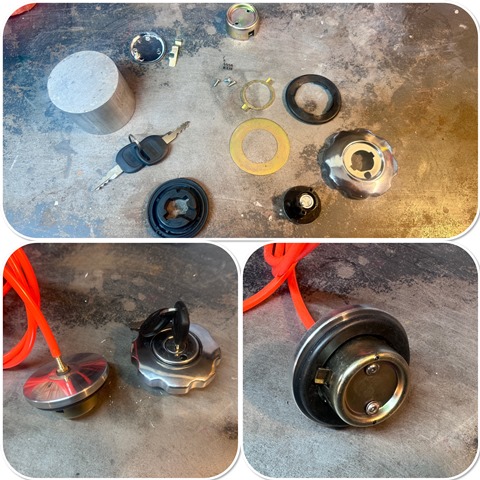
I looked at the filler cap that came new with the tank and decided it looked crap, so I took it apart and made a new on incorporating a breather.


__________________
check out my blog! www.jtccc.wordpress.com
buzzer is offline   Reply With Quote
Old 17-03-2024, 05:24 PM   #113
buzzer
Registered User
 
buzzer's Avatar
 
Join Date: Jun 2018
Location: Wolverhampton
Bike: M900
Posts: 404
I have come to a standstill now until the powder coater finishes my frame and parts, which is quite frustrating! Like so many business these days he just can't get good reliable staff so has a backlog...

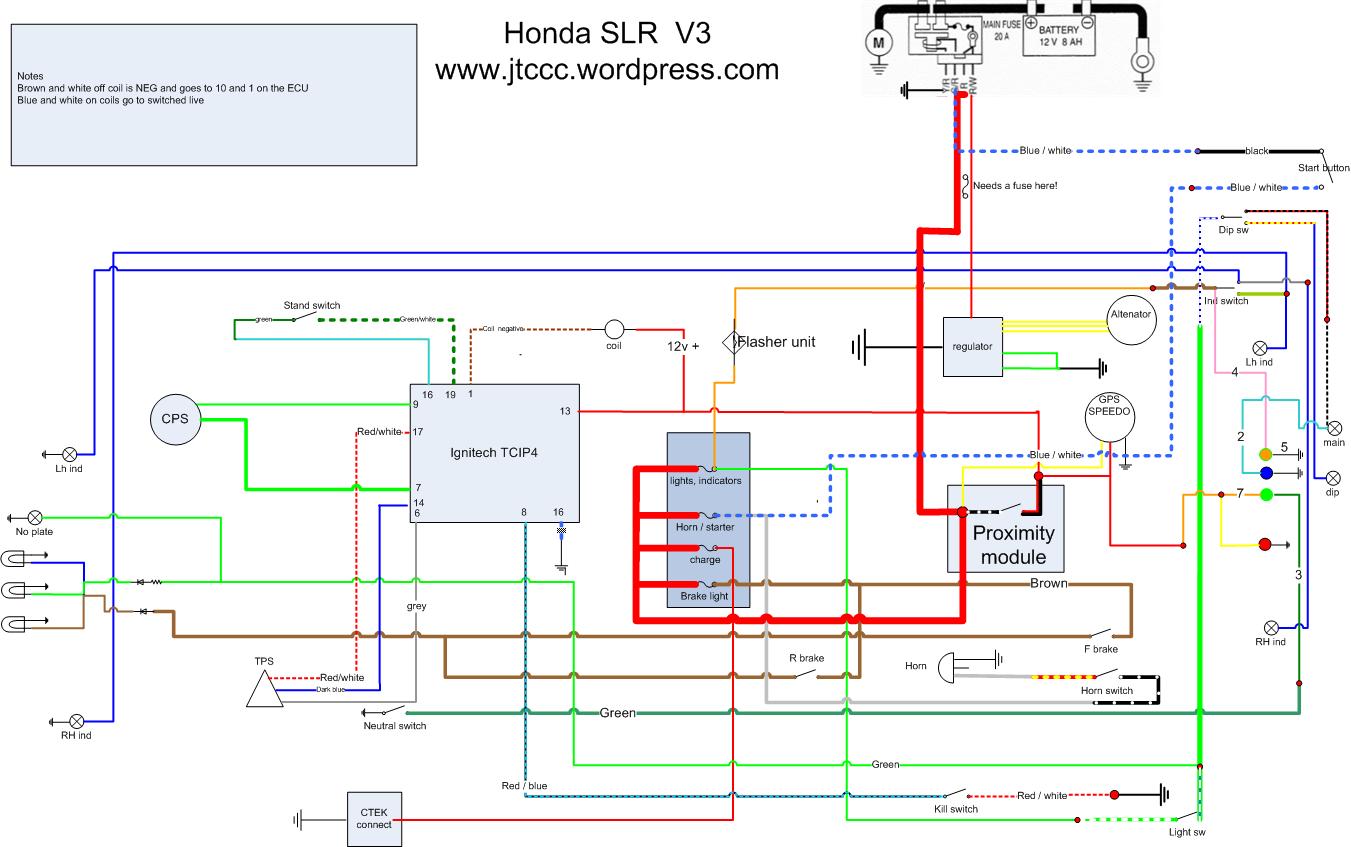
I have also finished the wiring diagram ready to do the electrics.


__________________
check out my blog! www.jtccc.wordpress.com
buzzer is offline   Reply With Quote
Old 29-03-2024, 06:49 PM   #114
buzzer
Registered User
 
buzzer's Avatar
 
Join Date: Jun 2018
Location: Wolverhampton
Bike: M900
Posts: 404
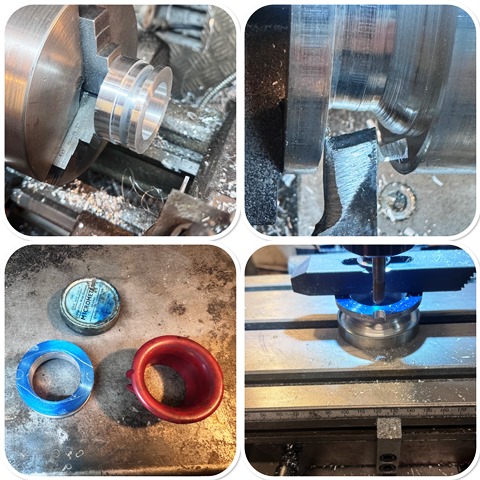
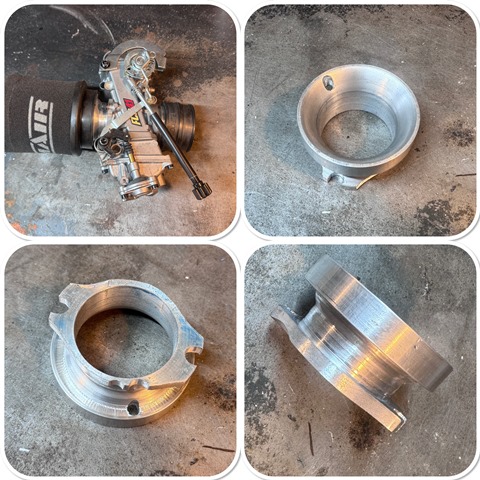
scratching around for jobs to do at the moment as the frame is still at the powder coaters… fingers crossed he has promised it for tomorrow… we will see. Today I made an adaptor to fit a foam filter on the FCR carb…


__________________
check out my blog! www.jtccc.wordpress.com
buzzer is offline   Reply With Quote
Old 30-03-2024, 10:03 AM   #115
900Rebuilder
Registered User
 
Join Date: Sep 2022
Location: Beeston
Bike: M900
Posts: 330
Looking great! Big singles are great fun in a light bike ��

BTW do you happen to have a wiring diagram for ignitech ignition, fi engine in carbed ducati at all? Just starting to figure mine out...
__________________
Ducati Monster 900 - Yamaha tdr125 & dt200wr - Ford GPW
900Rebuilder is offline   Reply With Quote
Old 30-03-2024, 05:34 PM   #116
buzzer
Registered User
 
buzzer's Avatar
 
Join Date: Jun 2018
Location: Wolverhampton
Bike: M900
Posts: 404
Quote:
Originally Posted by 900Rebuilder View Post
Looking great! Big singles are great fun in a light bike ��

BTW do you happen to have a wiring diagram for ignitech ignition, fi engine in carbed ducati at all? Just starting to figure mine out...
I do actually, its a very simple one as well, message me with your email
__________________
check out my blog! www.jtccc.wordpress.com
buzzer is offline   Reply With Quote
Old 30-03-2024, 05:35 PM   #117
buzzer
Registered User
 
buzzer's Avatar
 
Join Date: Jun 2018
Location: Wolverhampton
Bike: M900
Posts: 404
Well it looks like there will be another delay. The company I have used for many years for powder coating has messed me around for a month now, lots of broken promises, which resulted in me going over this morning and fetching it all back. Some of it is done, but not up to the usual standard, and the frame has just been blasted. Still charged me the price as if it was all done. Didn’t argue, just walked away.


So, I managed to match the paint colour and will do the frame in 2K which in many ways will be better.
__________________
check out my blog! www.jtccc.wordpress.com
buzzer is offline   Reply With Quote
Old 30-03-2024, 10:23 PM   #118
900Rebuilder
Registered User
 
Join Date: Sep 2022
Location: Beeston
Bike: M900
Posts: 330
Thumbs up

Quote:
Originally Posted by buzzer View Post
I do actually, its a very simple one as well, message me with your email
Many thanks - message enroute
__________________
Ducati Monster 900 - Yamaha tdr125 & dt200wr - Ford GPW
900Rebuilder is offline   Reply With Quote
Old 31-03-2024, 03:43 PM   #119
buzzer
Registered User
 
buzzer's Avatar
 
Join Date: Jun 2018
Location: Wolverhampton
Bike: M900
Posts: 404
for years I have had frames powder coated... the main reason was I hated the amount of overspray painting tubes makes in the garage...

However, powder coating does come with a few disadvantages... Firstly finding someone who will do a good job! I have had some terrible jobs done in the past... the other disadvantage is if there are any rust pits, you cant cover them with anything due to the powder coat process involving heat. With a sprayed finish you can use a 2K primer filler which does a brilliant job of covering them imperfections up. the other advantage is it's much easier to touch up in the future, plus and unlimited range of colours.

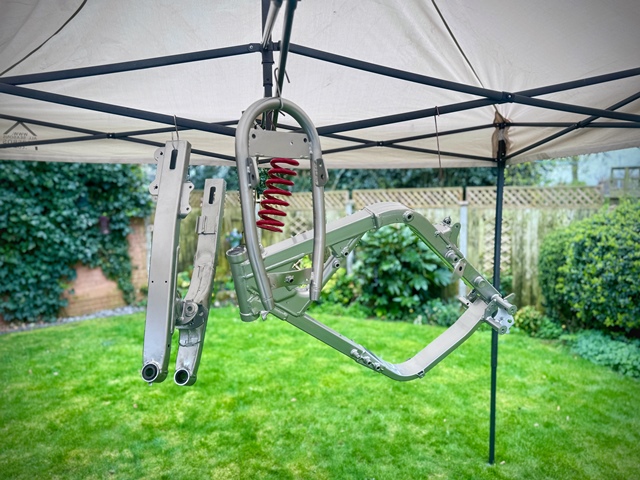
So after the powder coater messed me around again, I decided to paint the frame with 2K. here is the results.

I started with a thin coat of etch primer (or adhesion promoter as I prefer to call it!) followed by two coats of 2K primer filler. After a bit of a flat off with 800 I gave it two coats of silver base coat, followed by two of 2K lacquer.

I did this in the garden, under the Gazebo, which was brilliant! I am really pleased with the results and probably won't go back to powder coating again.


__________________
check out my blog! www.jtccc.wordpress.com
buzzer is offline   Reply With Quote
Old 04-04-2024, 09:59 AM   #120
buzzer
Registered User
 
buzzer's Avatar
 
Join Date: Jun 2018
Location: Wolverhampton
Bike: M900
Posts: 404
The other thing the powder coater did for me was the plating… but he didn’t, despite having it a month. I used to do this myself with a home kit, but it was hugely time consuming and he would do a batch for £45. I knew this had potential to hold me up again so after the bank holiday I made a list of local companies that did plating. The first one I visited said I would need to open an account… and the minimum invoice was £120… The second one, the reception was locked, so I wondered into the factory via a side door to be met with a very friendly guy, the owner of the company. I showed him what I had and he said he would do it… but they had a minimum charge… £28! He said come back next day as he would do it at the end of today’s production run. Next day I popped back… Fantastic job!

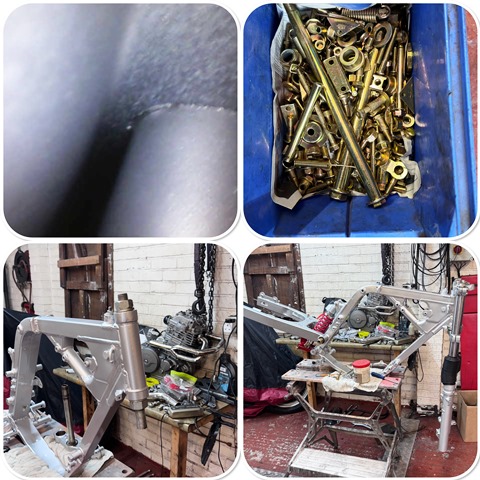
I hate hammering bearings in where there is an alternative… so I pull the head bearings into place with a large piece of threaded bar, this works a treat and allows the bearings to be seated nicely before assembling the headstock.

One job I needed to do was to check that there was no blasting media in the frame oil tank. Although I had sealed it you never know, that blast media has a habit of getting inside! I used my bore scope which is an excellent bit of kit! It has an 8mm camera probe and LED lights, it plugs directly into my phone so I can see inside things like engines, it takes stills and videos! All for £15! No sign of any media at all.

As I was doing it my wife came into the garage with a coffee… I said let me have a look in your ear… I checked inside her ear and said “just as I expected…nothing in there” she silently walked out… with my coffee

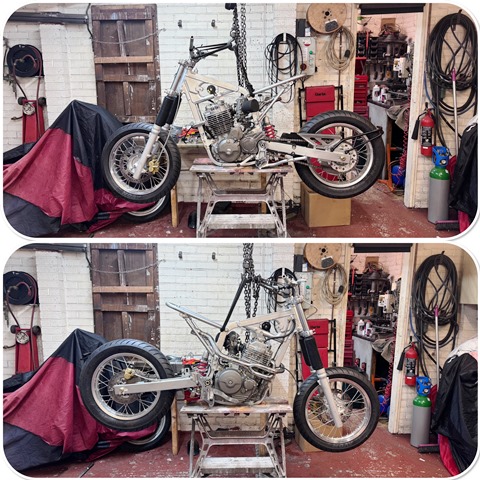
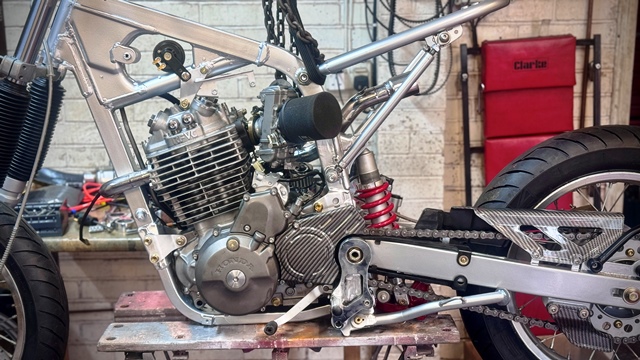
It’s all coming together fast now as you can see…


__________________
check out my blog! www.jtccc.wordpress.com
buzzer is offline   Reply With Quote
Reply


Posting Rules
You may not post new threads
You may not post replies
You may not post attachments
You may not edit your posts

BB code is On
Smilies are On
[IMG] code is On
HTML code is Off

Forum Jump


All times are GMT. The time now is 12:50 PM.

vBulletin Skins by vBmode.com. Powered by vBulletin® Version 3.8.3
Copyright ©2000 - 2024, Jelsoft Enterprises Ltd.