UK Monster Owners Club Forum » Gallery » UKMOC Bikes » Back with a M900 series I

Reply
 
Thread Tools Rating: Thread Rating: 8 votes, 5.00 average. Display Modes
Old 23-06-2015, 08:53 PM   #46
Albie
Fanactical volunteer
 
Albie's Avatar
 
Join Date: Oct 2003
Location: Kent
Bike: M900
Posts: 9,034
As I said last night will be working from the back end from now and tonight was the turn of the rear axle and brakes etc.

It actually started when I moved my bikes about as I wanted more room to do things and also wanted to hear it running outside in the open. Sadly it wouldn't start presuming the battery was getting tired. I know she will go but in the meantime its time to clean stuff up.


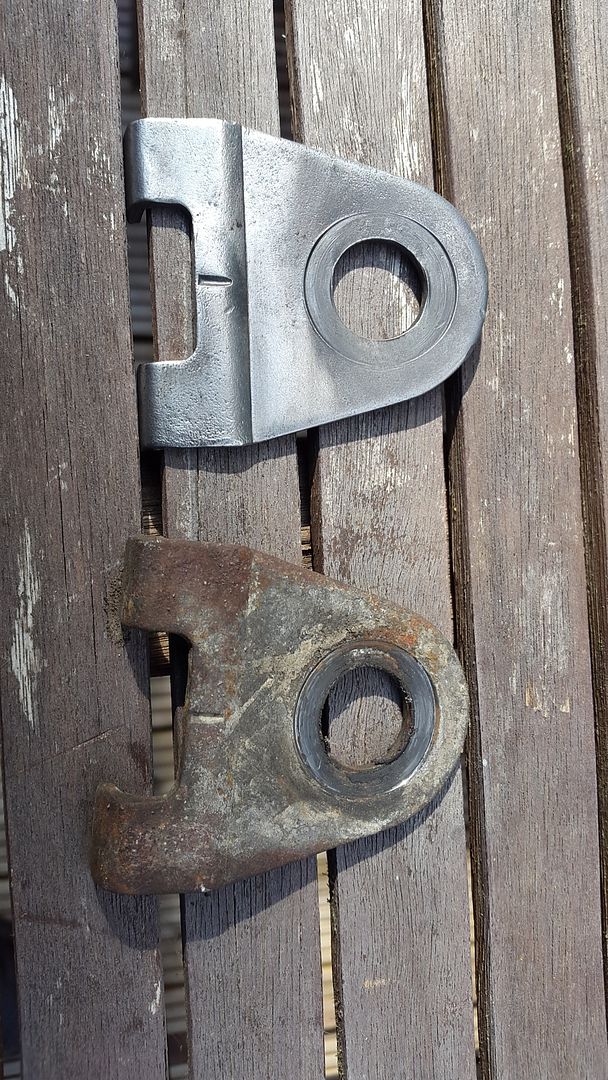
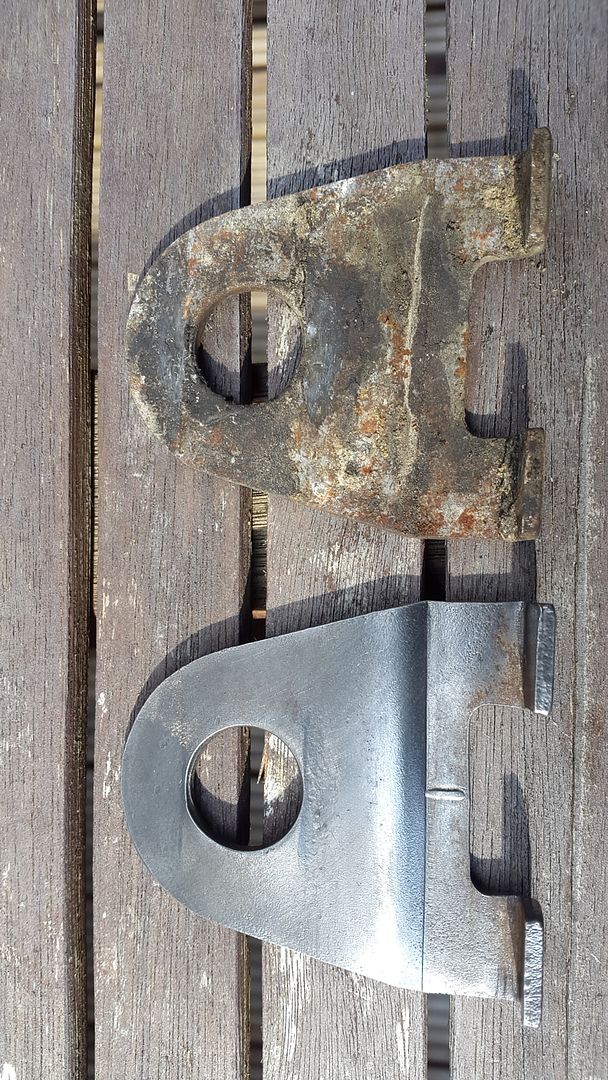
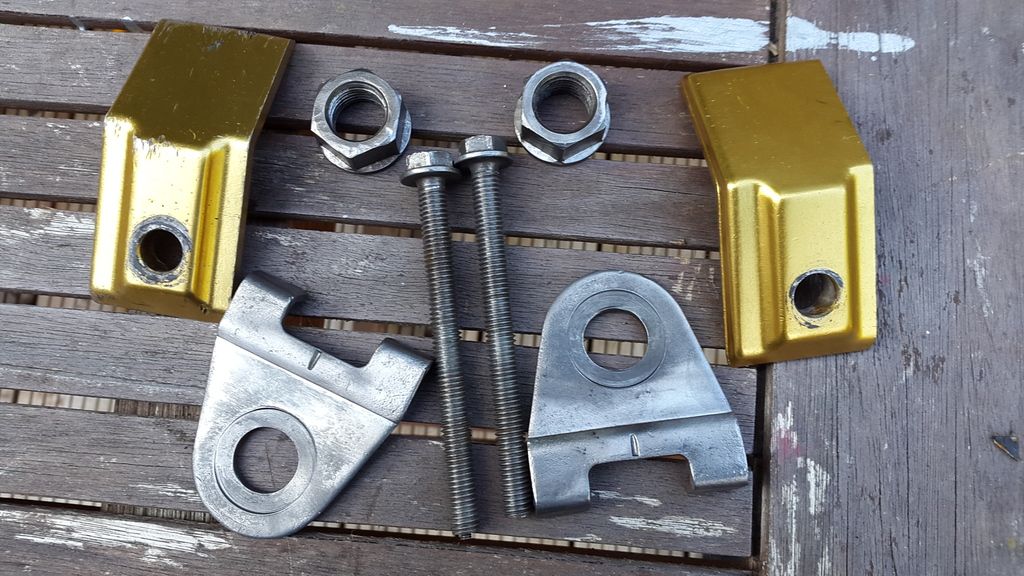
Removed the axle nuts which are good enough to use and only the righthand side one shows more wear than the other. Cleaned up ok though. The chain adjuster plates were quite grubby but look really good now and no bad marks or gouges to be seen.

The adjuster bolts which are about 100mm long were removed and covered in grime inside and once I wire wheeled and ran an M8 die down it they are good as new. The gold backplates were cleaned and the left hand one is the worst but not bad considering its age. Just a few scars but the colour is al good.

I will wait and do the axle and brake guide plate when the bike gets stripped down but I did the brake rotor bolts and they all look great condition as do the brake caliper bolts too after a brush down.

I could take the suspension hoop mount bolts out without the wheel coming out so again will wait but did the outside nuts.

I took the left hand hanger off to clean the rest of the bolts up and I need one or possibly two rubber inserts as one has split in two. Whilst off the chain swingarm guide was removed for cleaning and again the 3 dome bolts were good to come out and cleaned and prepped. The sprocket cover was then removed and same again and whilst removed I checked the front sprocket locking washer for getting the 2 bolts out. Yes results with no problem at all.

Whilst there I removed the 4 rubber plugs from the frame engine mounts. Full of grease which may have been when this frame was changed by a dealer years ago and someone had the hindsight to grease the bolts for the future removal instead of them corroding inside the engine casings. They both undid easily and nipped back up. I thought the would have been hexagon bolts but were allen head bolts.

It looks like the exhaust studs will also be easy as there is copperslip on them too but left them alone for now.

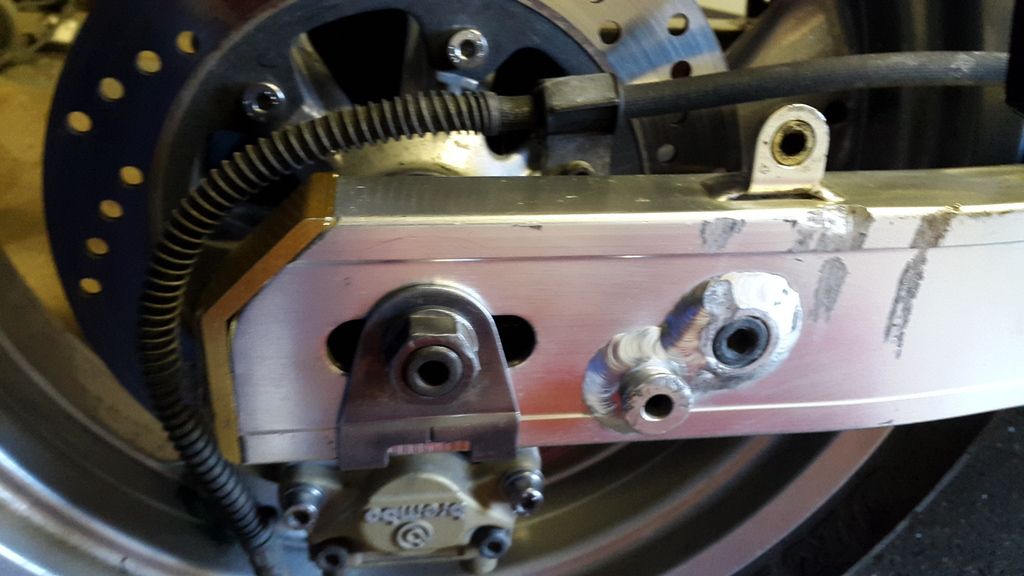
Whilst inspecting the swingarm there is damage which tbh I always expect on these alloy ones as they always seem to suffer exhaust mount bolts causing scrapes up the side where the bolts on the hangers seem to flex too much or they are possibly too long. I will dress it up as much as possible when I remove it.

I drilled out a broken bolt from one of the hugger mounts on the chain side. I re tapped it M6 and refitted the hugger with the cleaned up bolts to give it a good clean in place. It looks much better now but I still have to try and clean up some scrapes in the plastic on the right hand side if I can without ruining the overall finish.

Given a it a good clean as I go and is becoming tidy already prior to getting totally stripped and refinished.

Oh and I now realise how I broke that hanger bolt. It had a 12mm nut on the rear not really visible clamping an earth to the frame DOH !

So I have this odd bolt with an m8 thread with large allen key hole. It will work but its the only one that's odd. I also need one or two hanger rubber that go in the holes if anyone has any spare.

Last edited by Albie; 23-06-2015 at 10:14 PM..
Albie is offline   Reply With Quote
Old 23-06-2015, 09:08 PM   #47
Albie
Fanactical volunteer
 
Albie's Avatar
 
Join Date: Oct 2003
Location: Kent
Bike: M900
Posts: 9,034
Quote:
Originally Posted by Darkness View Post
Indeed: you wouldn't want to leave the exhaust pipes dirty brown like that......
Indeed.

A couples of things I would like to know again.

Seat cowl graphic placement from back of cowl to nearest point of the decal with picture if possible ?

The correct colour for the clutch cover and how does it compare to belt covers ?

Is the horn colour black ?

Bar ends. They were black but are the weighted ?
Albie is offline   Reply With Quote
Old 23-06-2015, 09:51 PM   #48
Pedro
Ciao, come stai?
 
Pedro's Avatar
 
Join Date: Apr 2003
Location: Somewhere
Bike: Multiple Monsters
Posts: 4,158
Quote:
Originally Posted by Albie View Post
Indeed.

A couples of things I would like to know again.

Seat cowl graphic placement from back of cowl to nearest point of the decal with picture if possible ?

The correct colour for the clutch cover and how does it compare to belt covers ?

Is the horn colour black ?

Bar ends. They were black but are the weighted ?
The clutch cover should silver as per the crank cases, belt covers should be black, the horn on mine is silver.

Bar ends are weighted, the correct ones have a cross head screw head.
__________________
Monster 1200R!
KTM 990 SuperDuke
Pedro is offline   Reply With Quote
Old 23-06-2015, 10:08 PM   #49
Albie
Fanactical volunteer
 
Albie's Avatar
 
Join Date: Oct 2003
Location: Kent
Bike: M900
Posts: 9,034
Ok that's good. Horn is wrong then but may have been replaced. I am going to have to get covers stripped of this paint . Hoping to get all the hangers stripped back down very soon as the paints too glossy and spoils it.
Ok spotted the bar ends in the bible and yes cross head large screw.

Was the alternator nut cover fixed with 2 slotted screws. I am thinking cross head or allen key.
Albie is offline   Reply With Quote
Old 23-06-2015, 10:14 PM   #50
Albie
Fanactical volunteer
 
Albie's Avatar
 
Join Date: Oct 2003
Location: Kent
Bike: M900
Posts: 9,034
Pics


Albie is offline   Reply With Quote
Old 25-06-2015, 08:28 PM   #51
Albie
Fanactical volunteer
 
Albie's Avatar
 
Join Date: Oct 2003
Location: Kent
Bike: M900
Posts: 9,034
Clutch is well worn

Tonight I did some more and think basically now is a standstill until I get advise or engine fully checked out.
It may be good news that I have found a few things wrong that could mean things could be alright when fixed but I really don't know for sure.

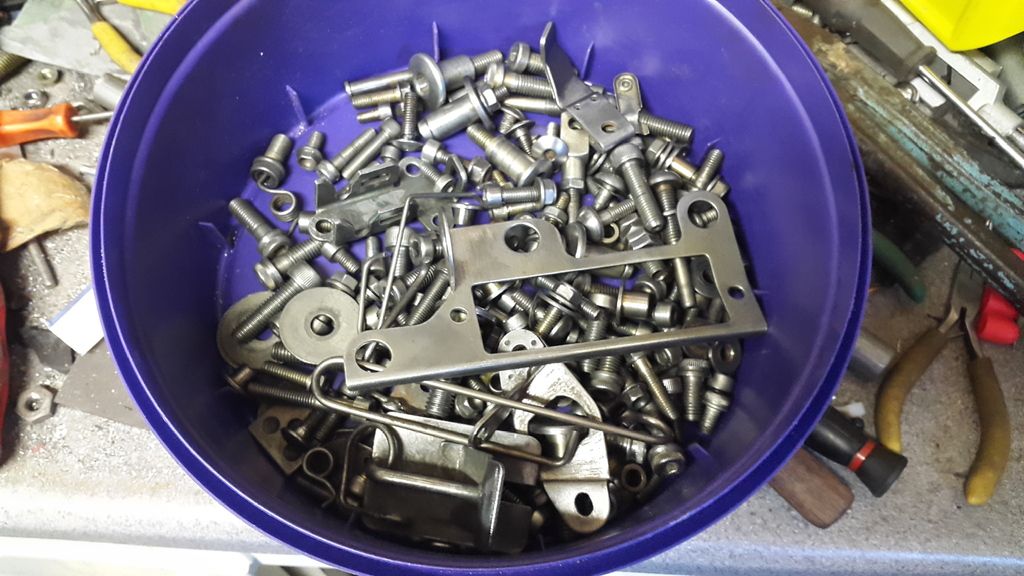
I was cleaning the last of the bolts accessible to me like all around the engine cases and brackets and cleaned up the key lock metalwork and blow me the 2 tiny screws that hole the latch to the lock came out without any problem in fact they were loose. The cables good and wont be wasting good money on a new one but will lacquer over the cleaned fittings. The rest all came apart and is in the plating bucket.
The part that refuses absolutely to budge is the steering lock adjuster on the left side which although has been soaking for 48hrs in a bath of release agaent and even when heat applied it will not exit. Key is still strong but don't want to mess it up whilst on bike so when I get forks stripped I may get better purchase or buy a new one.

So this clutch which has been bugging me. I believed it was not correct on sight and wondered if the knocking may have been it.
I removed the springs and collars and armed with the Haynes book of lies measured the springs and should be 36.5mm long and all 6 are 40mm so are a 600 or 750 engine it seems.
I cleaned them up and the caps and bolts anyhow and then removed the clutch plates.
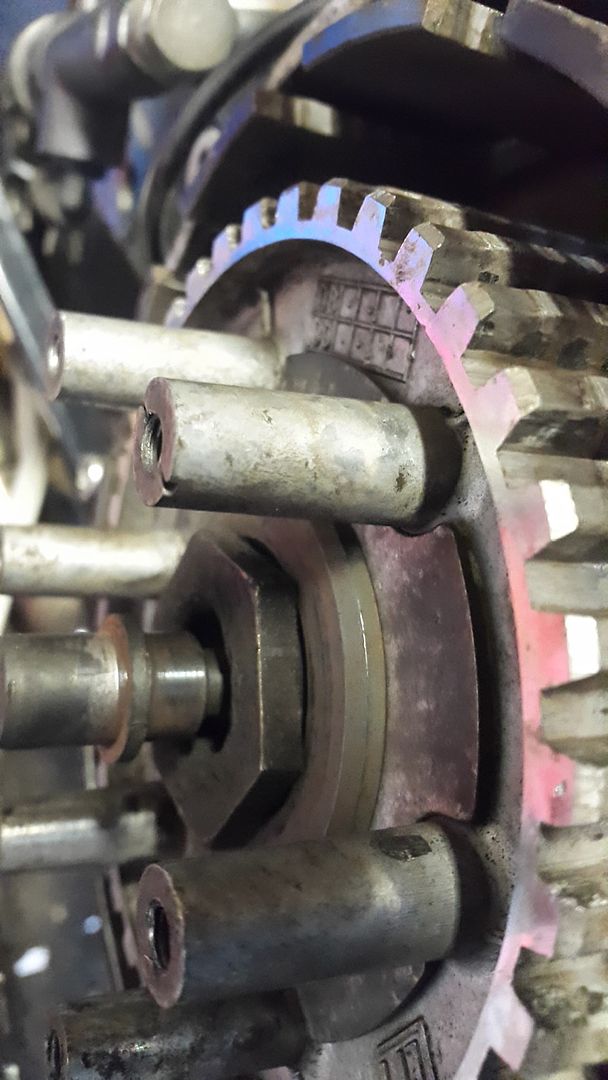
OH DEAR they are almost flat to the plate and measure around 2.81mm to best 2.83mm .
They are deemed to the project trophy pile and new ones are being sourced.

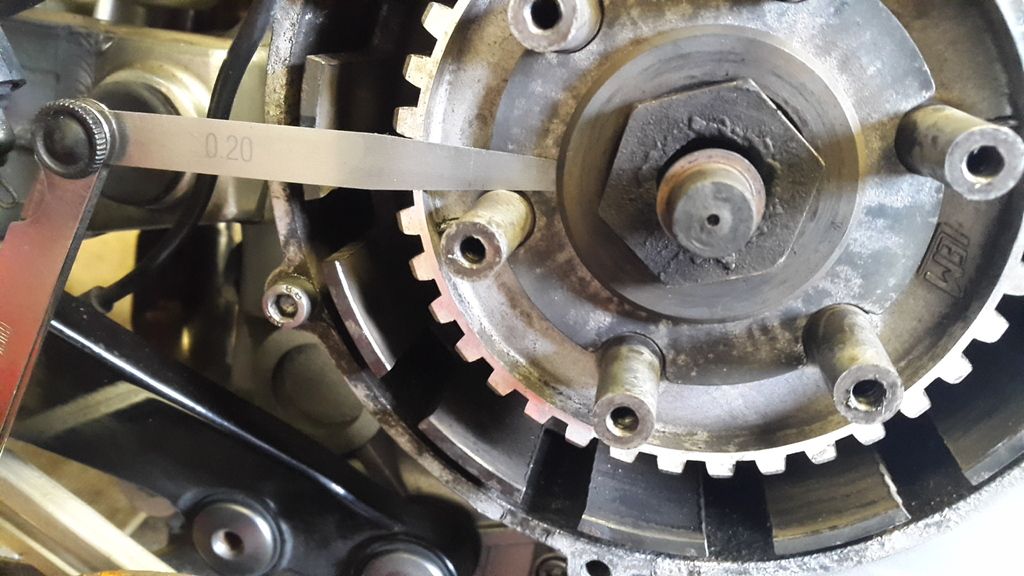
Then checking the pressure plate it does have a new bearing as was told by the last owner. Then I was looking at the locking nut. It looks tight but there is play to and fro when you pull the clutch drum and I can get a feeler gauge of 0.2mm in between the washer and nut washer. Is that the problem. ???? :confused
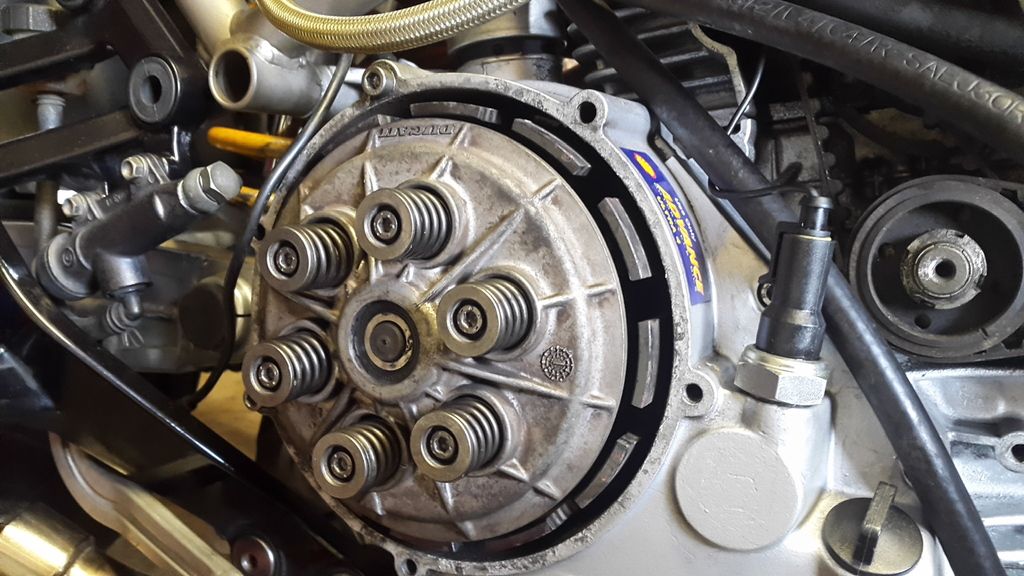
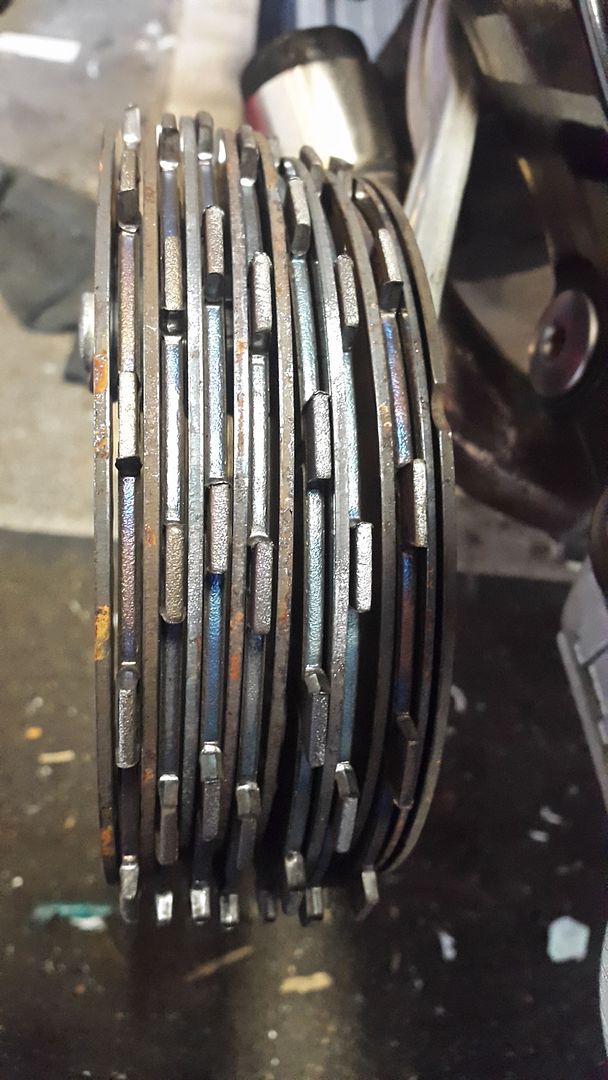


Oh dear me
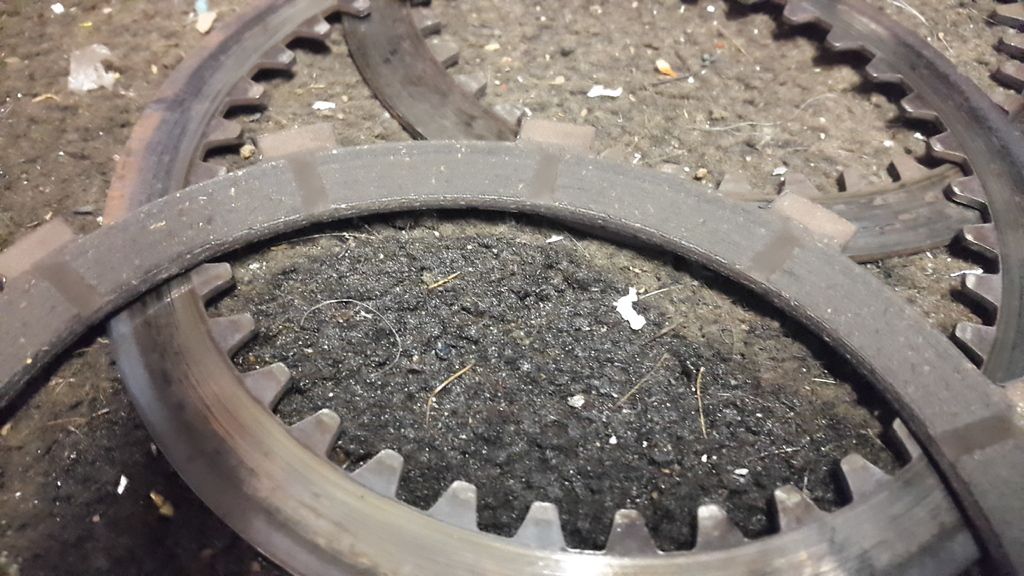


Gap
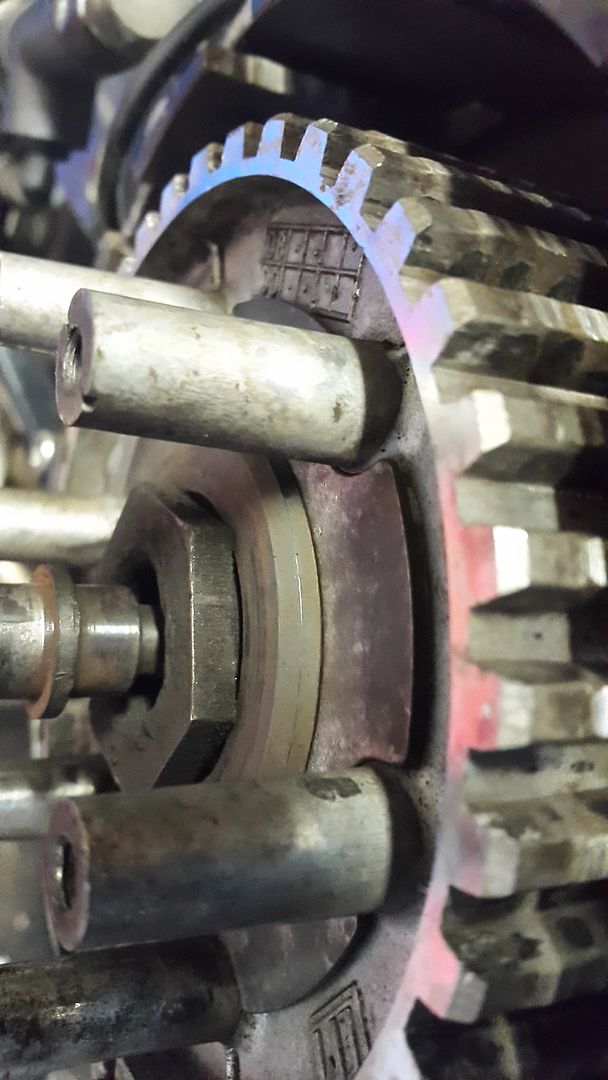

No Gap


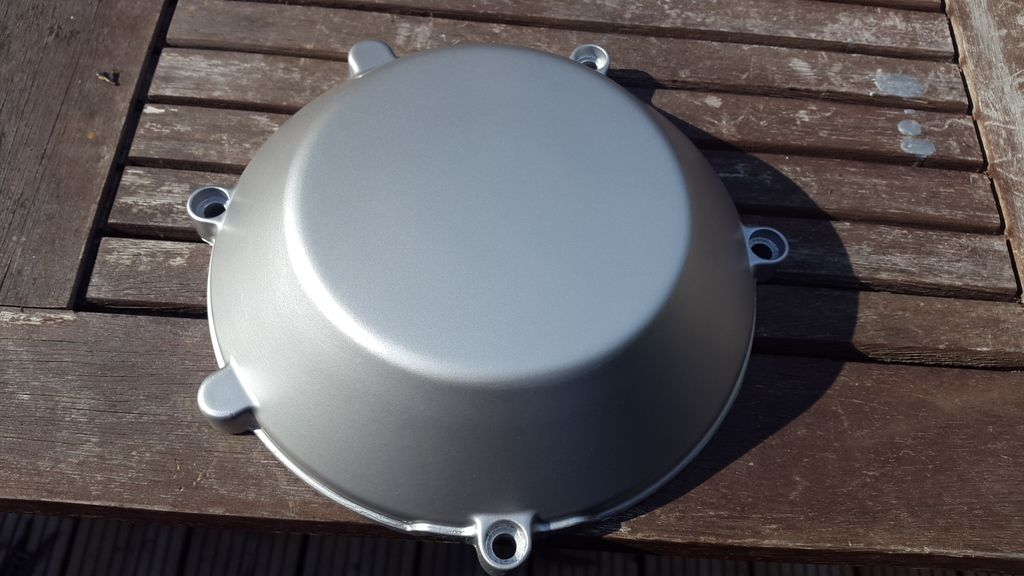
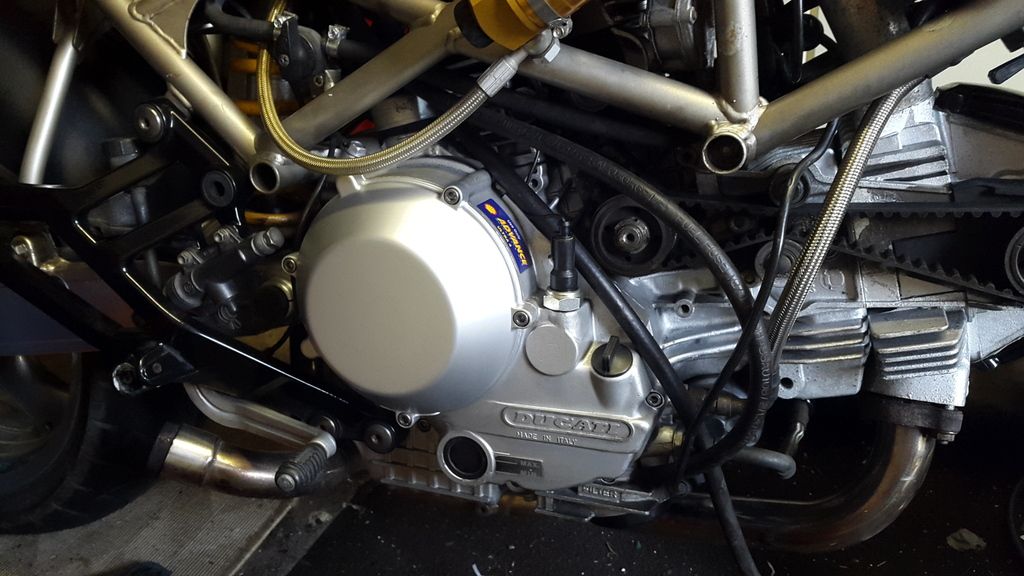
I spray painted the clutch cover silver to see what it will look like and get a engine colour comparison. Looks better already and I managed to removed the last piece of belt cover plastic from the bike.

Albie is offline   Reply With Quote
Old 25-06-2015, 08:29 PM   #52
Albie
Fanactical volunteer
 
Albie's Avatar
 
Join Date: Oct 2003
Location: Kent
Bike: M900
Posts: 9,034
Alternator side all the bolts were removed one by one and cleaned and put back and did find one that may be stripped thread in the casing.
Removed the inspection cover and removed the paint and cleaned and file dressed the slotted screws to good as new.


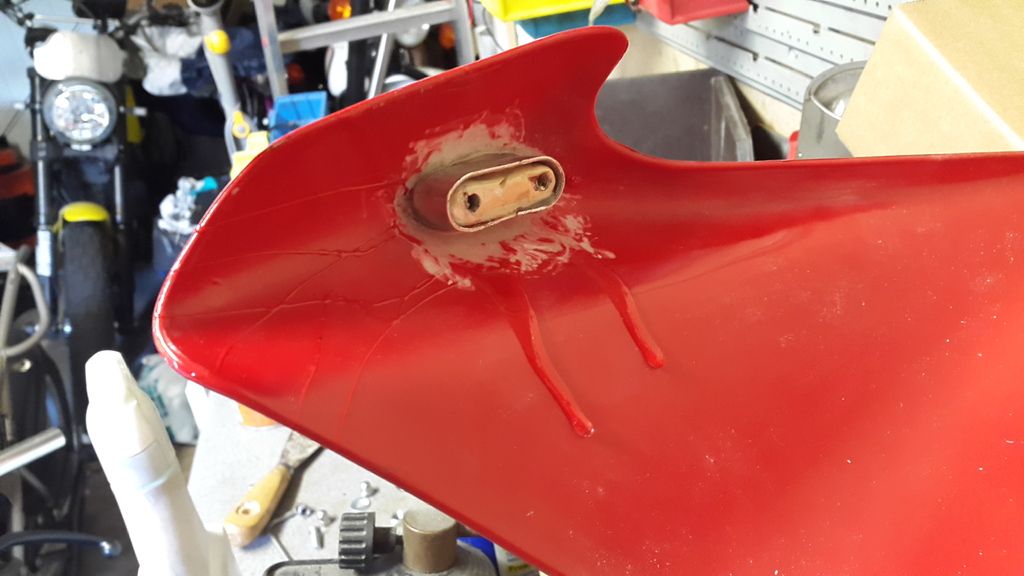
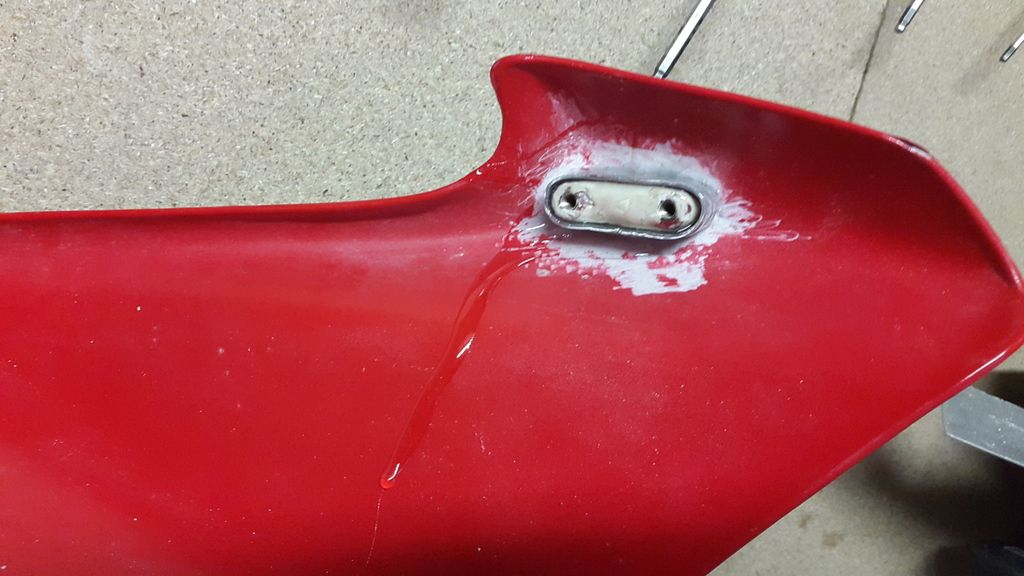
Made some aluminium surrounds for around the cowl mountings and araldited them on and will just require some minor filling in the top tomorrow and be neater than before and look better once sprayed. It means the bolts or plactic cannot break out ever and be stronger.


Last edited by Albie; 25-06-2015 at 08:47 PM..
Albie is offline   Reply With Quote
Old 26-06-2015, 08:50 AM   #53
Pedro
Ciao, come stai?
 
Pedro's Avatar
 
Join Date: Apr 2003
Location: Somewhere
Bike: Multiple Monsters
Posts: 4,158
Alternator cover plate had slotted screw heads, not hex or cross heads

I've seen worse clutches....
__________________
Monster 1200R!
KTM 990 SuperDuke
Pedro is offline   Reply With Quote
Old 26-06-2015, 09:16 AM   #54
Albie
Fanactical volunteer
 
Albie's Avatar
 
Join Date: Oct 2003
Location: Kent
Bike: M900
Posts: 9,034
Quote:
Originally Posted by Pedro View Post
Alternator cover plate had slotted screw heads, not hex or cross heads

I've seen worse clutches....
More of a spacer than a clutch. I need to fabricate a drum lock. Some filing to do then.

Last edited by Albie; 26-06-2015 at 10:30 AM..
Albie is offline   Reply With Quote
Old 26-06-2015, 09:36 AM   #55
Darren69
Transmaniacon MOC
 
Darren69's Avatar
 
Join Date: Sep 2013
Location: Sutton In Ashfield
Bike: Multiple Monsters
Posts: 6,095
Quote:
Originally Posted by Albie View Post
More of a spacer than a clutch. I need to fabricate a drum lock. Some fine to do then.
I'm sure you will use the old clutch plates to make a holding tool.
__________________
Roast Beef Monster!

Termignoni and Bucci - Italian for pipe and slippers!

S4 Fogarty, S4R 07T, 748, Series 1 Mirage
Darren69 is offline   Reply With Quote
Old 26-06-2015, 10:29 AM   #56
Albie
Fanactical volunteer
 
Albie's Avatar
 
Join Date: Oct 2003
Location: Kent
Bike: M900
Posts: 9,034
Quote:
Originally Posted by Darren69 View Post
I'm sure you will use the old clutch plates to make a holding tool.
I don't think you can use the old friction plates and you need to use the toothed spacer ones which are totally reuseable. I have been looking at videos and they have some alloy ones that you bolt to the outer casing. I have plenty of time between now and next year.
Albie is offline   Reply With Quote
Old 26-06-2015, 02:00 PM   #57
DrD
Guest
 
Posts: n/a
Avanti seem to sell a neat one: http://www.avantiraceparts.co.uk/shop.php?id=3&cat=7
Quote:
This clutch hub and basket holding tool is so simple yet so effective. Made from solid Delrin, a very tough plastic, it bolts into the clutch cover holes and locks both the clutch centre hub and basket in place, allowing easy assembly and disassembly of the clutch. Because it's made of plastic, it won't scratch your case or clutch hub and basket either! Includes grade 8.8 mounting bolts too.
  Reply With Quote
Old 26-06-2015, 02:05 PM   #58
Darren69
Transmaniacon MOC
 
Darren69's Avatar
 
Join Date: Sep 2013
Location: Sutton In Ashfield
Bike: Multiple Monsters
Posts: 6,095
I've not used one of those before but I've read horror stories of people using that type of holder and breaking the crankcase as its not strong enough to cope with the forces required.
__________________
Roast Beef Monster!

Termignoni and Bucci - Italian for pipe and slippers!

S4 Fogarty, S4R 07T, 748, Series 1 Mirage
Darren69 is offline   Reply With Quote
Old 26-06-2015, 02:07 PM   #59
Dennis menace
Registered User
 
Dennis menace's Avatar
 
Join Date: Nov 2013
Location: Farnsfield
Bike: Other Ducati
Posts: 300
Has anyone tried this:
https://www.machinemart.co.uk/shop/p...-hub-drum-tool

At £6.82 it sounds too good to be true, and probably is!
Dennis menace is offline   Reply With Quote
Old 26-06-2015, 02:15 PM   #60
Darren69
Transmaniacon MOC
 
Darren69's Avatar
 
Join Date: Sep 2013
Location: Sutton In Ashfield
Bike: Multiple Monsters
Posts: 6,095
http://www.ducati.ms/forums/56-super...home-made.html
__________________
Roast Beef Monster!

Termignoni and Bucci - Italian for pipe and slippers!

S4 Fogarty, S4R 07T, 748, Series 1 Mirage
Darren69 is offline   Reply With Quote
Reply


Posting Rules
You may not post new threads
You may not post replies
You may not post attachments
You may not edit your posts

BB code is On
Smilies are On
[IMG] code is On
HTML code is Off

Forum Jump


All times are GMT. The time now is 10:53 AM.

vBulletin Skins by vBmode.com. Powered by vBulletin® Version 3.8.3
Copyright ©2000 - 2024, Jelsoft Enterprises Ltd.