Register | FAQ | Members List | Calendar | Today's Posts | Search | Contact |
|
Registered
Members: 641 | Total Threads: 50,835 | Total Posts: 518,617 Currently Active Users: 595 (0 active members) Please welcome our newest member, DarnCyclists |
|
|
Thread Tools | Rating: | Display Modes |
|
28-06-2015, 08:00 PM | #1 |
Fanactical volunteer
Join Date: Oct 2003
Location: Kent
Bike: M900
Posts: 9,033
|
No I realised its a carb heater when looked at feed to carbs
__________________
http://albies93m900.blogspot.co.uk/ |
20-06-2015, 02:16 AM | #2 |
Guest
Posts: n/a
|
Question 1.
There is a tap on the oil feed line from crankcase to cooler. Is this an on/off for a purpose. No carb heaters on this one. That is not standard - maybe for winter use as means of switching that cooler off. |
21-06-2015, 06:41 PM | #3 |
Fanactical volunteer
Join Date: Oct 2003
Location: Kent
Bike: M900
Posts: 9,033
|
Well as it was fathers day and don't appear to have any I decided to have a lay in and then ponse about with Monster. Seat cowl lugs all strong and good and ready to have the cowl resprayed asap. I will further try to neaten area up and if necessary make a surround.
Then on to the wire wheel for some bolt restoration and other parts. All coming up well because they were not so corroded and grubby in reality. Washers seem to be the worst culprits. I managed to fix the broken hanger bolt by drilling out the broken stud and tapping it through m8 and putting a stud in there. I will then try to get our specialist welder BigOz to neatly weld the stud in place before coloured zincing. I hope to get the engine examination done this week if I can then can seriously get on with the stripping down all the rest of parts inc axles etc and replated in a batch. Brake lever now straight The tap on the oil line feed I welded the plastic on the top left piece of inner mudguard with a soldering iron Rear plate hanger is cleaned and number plate light removed after cutting nuts off. Found it has an LED bulb in it so a bonus. Ordered a new rubber cover for this but need to get wires out to feed over. £1.85 from ebay for a 4 way one. Just to make it look right and stop water ingress in the future.
__________________
http://albies93m900.blogspot.co.uk/ Last edited by Albie; 21-06-2015 at 08:51 PM.. |
21-06-2015, 08:52 PM | #4 |
Ciao, come stai?
Join Date: Apr 2003
Location: Somewhere
Bike: Multiple Monsters
Posts: 4,157
|
The tap is for carb heaters, your bike should have them if it's got it's original carbs. Are there two bolts in the bottom of the float bowls? If so, them someone has taken the pipes off. I've not seen an early bike without them
No gasket under the clutch cover and it should also be grey not black
__________________
Monster 1200R! KTM 990 SuperDuke |
21-06-2015, 08:56 PM | #5 | |
Fanactical volunteer
Join Date: Oct 2003
Location: Kent
Bike: M900
Posts: 9,033
|
Quote:
__________________
http://albies93m900.blogspot.co.uk/ |
|
21-06-2015, 09:06 PM | #6 |
Fanactical volunteer
Join Date: Oct 2003
Location: Kent
Bike: M900
Posts: 9,033
|
Yes you were correct the tap has a pipe to carbs. I should have realised from my 97' monster days.
__________________
http://albies93m900.blogspot.co.uk/ |
22-06-2015, 09:17 PM | #7 |
Fanactical volunteer
Join Date: Oct 2003
Location: Kent
Bike: M900
Posts: 9,033
|
Finished it tonight
Looking pretty fine now.. Obviously not but got somewhere at least cracking some bolts off and cleaning them up before putting them back. Most of the brake disc ones are new bar 3 of them so they must have been butchered with corrosion. Got my swapsie tail light today and seeing about getting seat cowl painted asap. Hoping can get bike to Al @ proteam this week and waiting a reply back. Forks are in decent condition and very few light scratches only but faded out sadly but no corrosion anywhere at all and seals are new. The horn has very little corrosion either and still had a clear plastic film on the front. I may repaint it again though but not sure if would be black ? Wiring at the front needs just re-taping on a small area of kill switch cable but I have to fit that new rubber boot on so may put new pvc sheath on to match. More cleaning from the parts bin slowly, honestly there is more in ther now from last time Nothing major happening but will start from the back the same tomorrow and maybe next week I will be able to get engine out if all becomes obvious. Some pics
__________________
http://albies93m900.blogspot.co.uk/ |
23-06-2015, 05:55 PM | #8 |
.
Join Date: May 2007
Location: Stockbridge
Bike: M900
Posts: 1,984
|
Indeed: you wouldn't want to leave the exhaust pipes dirty brown like that......
__________________
Original and Best since 1993 |
23-06-2015, 07:53 PM | #9 |
Fanactical volunteer
Join Date: Oct 2003
Location: Kent
Bike: M900
Posts: 9,033
|
As I said last night will be working from the back end from now and tonight was the turn of the rear axle and brakes etc.
It actually started when I moved my bikes about as I wanted more room to do things and also wanted to hear it running outside in the open. Sadly it wouldn't start presuming the battery was getting tired. I know she will go but in the meantime its time to clean stuff up. Removed the axle nuts which are good enough to use and only the righthand side one shows more wear than the other. Cleaned up ok though. The chain adjuster plates were quite grubby but look really good now and no bad marks or gouges to be seen. The adjuster bolts which are about 100mm long were removed and covered in grime inside and once I wire wheeled and ran an M8 die down it they are good as new. The gold backplates were cleaned and the left hand one is the worst but not bad considering its age. Just a few scars but the colour is al good. I will wait and do the axle and brake guide plate when the bike gets stripped down but I did the brake rotor bolts and they all look great condition as do the brake caliper bolts too after a brush down. I could take the suspension hoop mount bolts out without the wheel coming out so again will wait but did the outside nuts. I took the left hand hanger off to clean the rest of the bolts up and I need one or possibly two rubber inserts as one has split in two. Whilst off the chain swingarm guide was removed for cleaning and again the 3 dome bolts were good to come out and cleaned and prepped. The sprocket cover was then removed and same again and whilst removed I checked the front sprocket locking washer for getting the 2 bolts out. Yes results with no problem at all. Whilst there I removed the 4 rubber plugs from the frame engine mounts. Full of grease which may have been when this frame was changed by a dealer years ago and someone had the hindsight to grease the bolts for the future removal instead of them corroding inside the engine casings. They both undid easily and nipped back up. I thought the would have been hexagon bolts but were allen head bolts. It looks like the exhaust studs will also be easy as there is copperslip on them too but left them alone for now. Whilst inspecting the swingarm there is damage which tbh I always expect on these alloy ones as they always seem to suffer exhaust mount bolts causing scrapes up the side where the bolts on the hangers seem to flex too much or they are possibly too long. I will dress it up as much as possible when I remove it. I drilled out a broken bolt from one of the hugger mounts on the chain side. I re tapped it M6 and refitted the hugger with the cleaned up bolts to give it a good clean in place. It looks much better now but I still have to try and clean up some scrapes in the plastic on the right hand side if I can without ruining the overall finish. Given a it a good clean as I go and is becoming tidy already prior to getting totally stripped and refinished. Oh and I now realise how I broke that hanger bolt. It had a 12mm nut on the rear not really visible clamping an earth to the frame DOH ! So I have this odd bolt with an m8 thread with large allen key hole. It will work but its the only one that's odd. I also need one or two hanger rubber that go in the holes if anyone has any spare.
__________________
http://albies93m900.blogspot.co.uk/ Last edited by Albie; 23-06-2015 at 09:14 PM.. |
23-06-2015, 08:08 PM | #10 | |
Fanactical volunteer
Join Date: Oct 2003
Location: Kent
Bike: M900
Posts: 9,033
|
Quote:
A couples of things I would like to know again. Seat cowl graphic placement from back of cowl to nearest point of the decal with picture if possible ? The correct colour for the clutch cover and how does it compare to belt covers ? Is the horn colour black ? Bar ends. They were black but are the weighted ?
__________________
http://albies93m900.blogspot.co.uk/ |
|
23-06-2015, 08:51 PM | #11 | |
Ciao, come stai?
Join Date: Apr 2003
Location: Somewhere
Bike: Multiple Monsters
Posts: 4,157
|
Quote:
Bar ends are weighted, the correct ones have a cross head screw head.
__________________
Monster 1200R! KTM 990 SuperDuke |
|
29-06-2015, 03:28 PM | #12 |
Monsterless again for now
Join Date: Sep 2002
Location: Wiltshire
Bike: M900
Posts: 3,189
|
Sorry late joiner ! looking mega mate - no surprise there though.
had a cowl you could have had for a donation to riders for health but see you're sorted mate. 
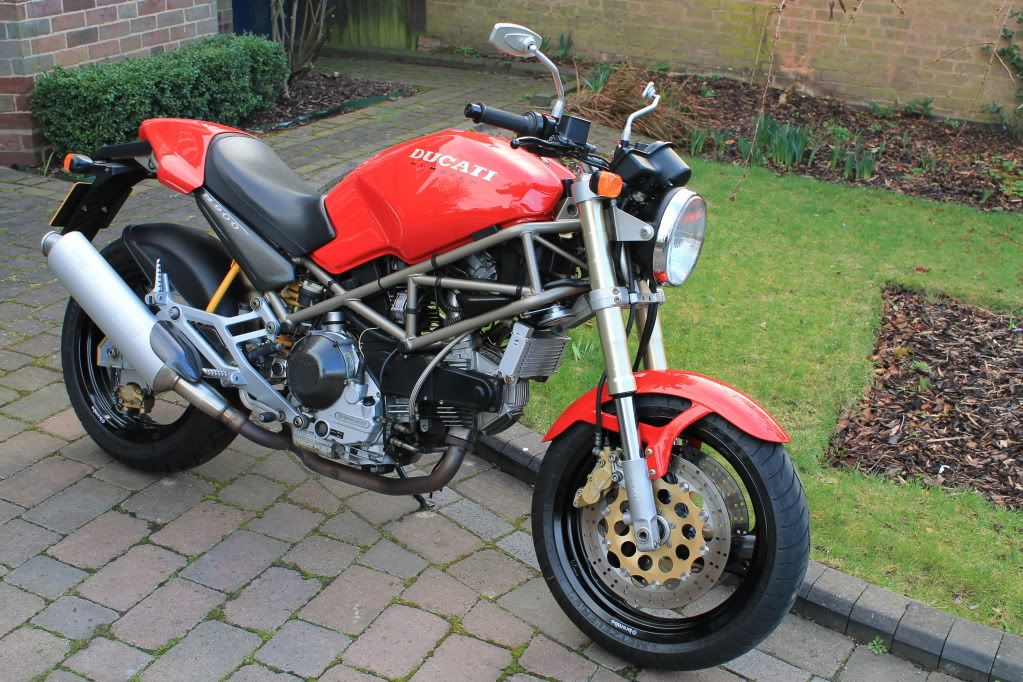
so what's my old tricolore up to these days. Miss that bike ! |
29-06-2015, 07:11 PM | #13 | |
Fanactical volunteer
Join Date: Oct 2003
Location: Kent
Bike: M900
Posts: 9,033
|
Quote:
Tons of work to do though as this is almost preparatory work. Look out for some good stock exhausts chamfered or not is ok but need cheap as little money. 
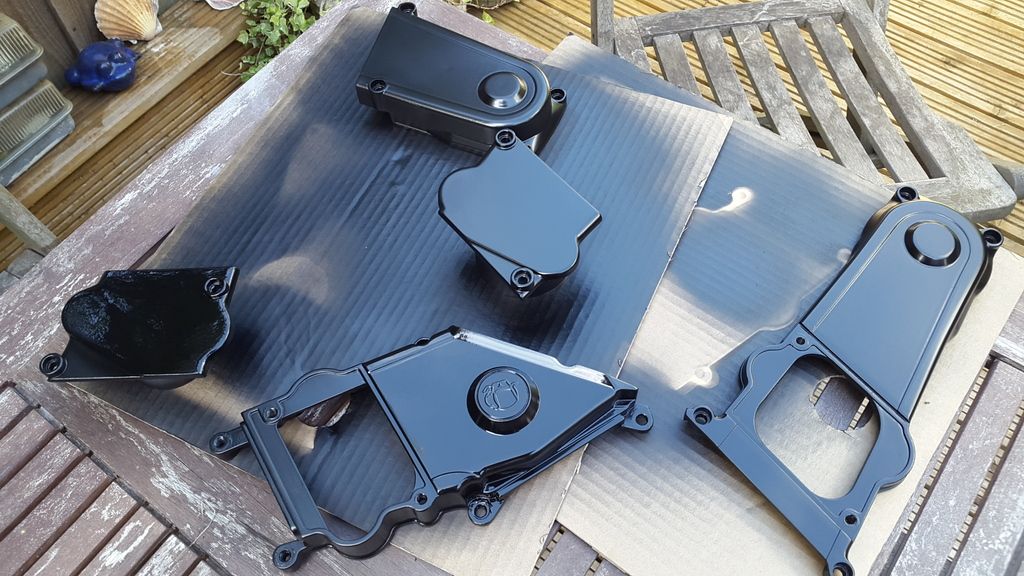
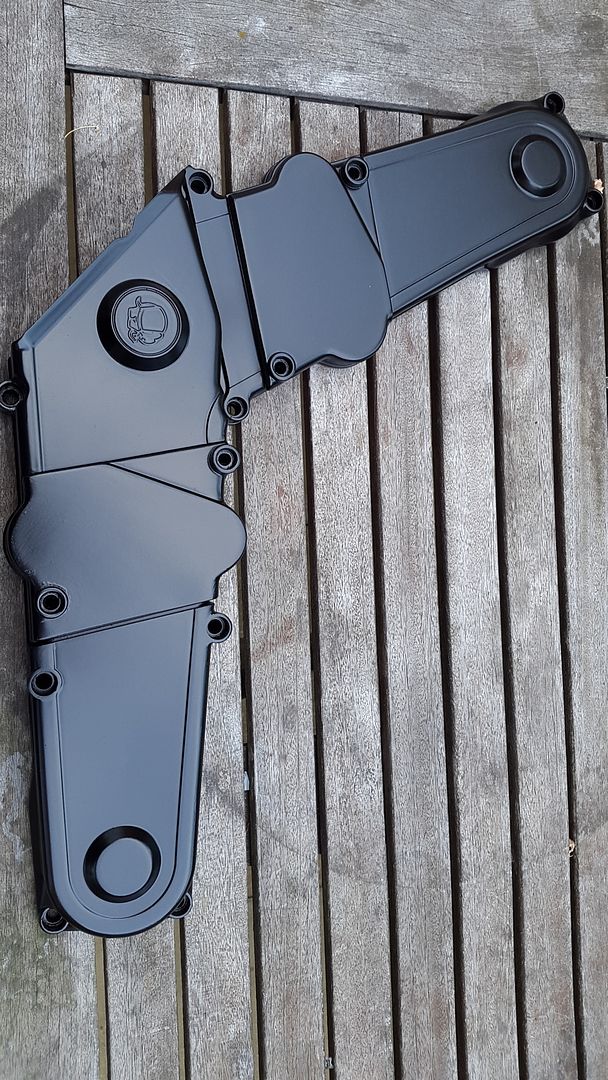
So tonight after a plan to try and gently sand blast this 2 pack gloss metallic with gold fleck lexus painted cambelt covers which sort of failed I went down the route of getting a satin black finish paint from Halfords along with some gold for the brakes and a primer for the bare metal. The reason I wanted rid of paint was purely to get to the plastic and just keep them clean but I actually think they look good now but how will they last is the question. I keyed them back and the one that took the blasting I had to flatten right back to plastic but I could not do that to the rest as too many shapes and nooks and crannies. They have had about 3-4 light coats and can have a long time curing as no need for them for months so will be stowed away safely. 
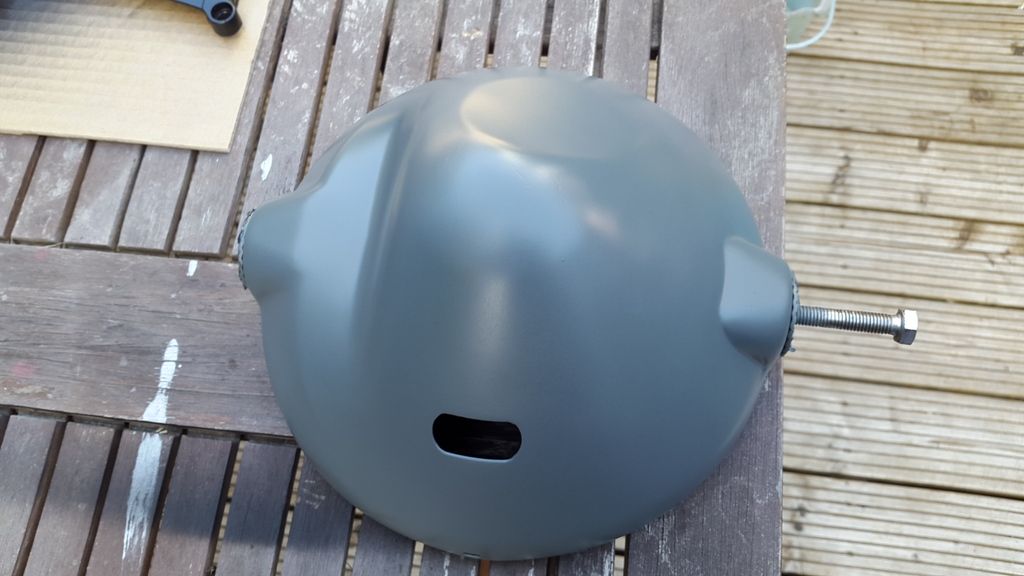
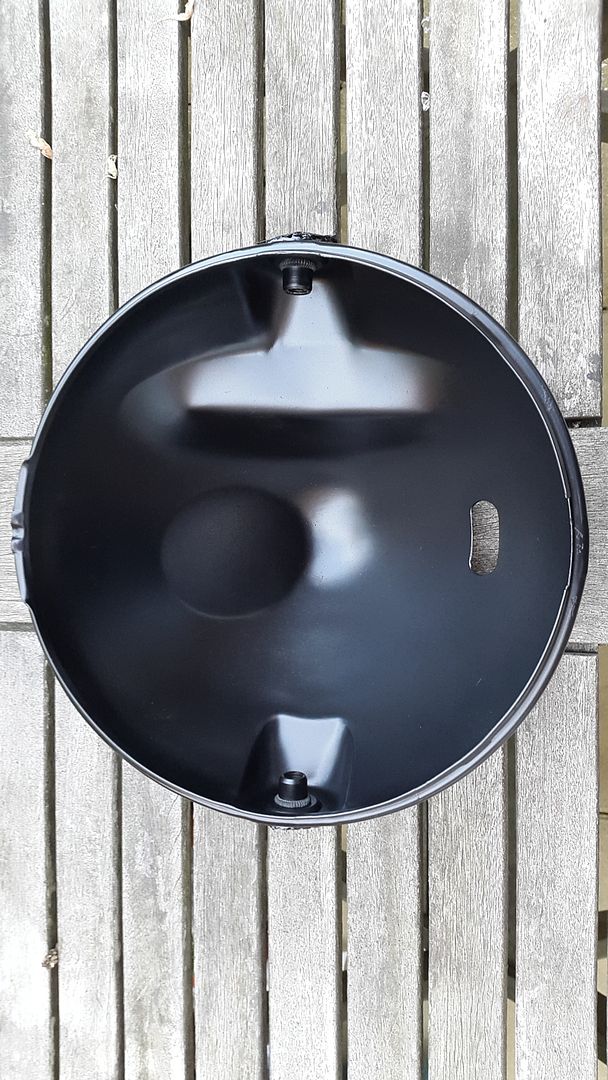
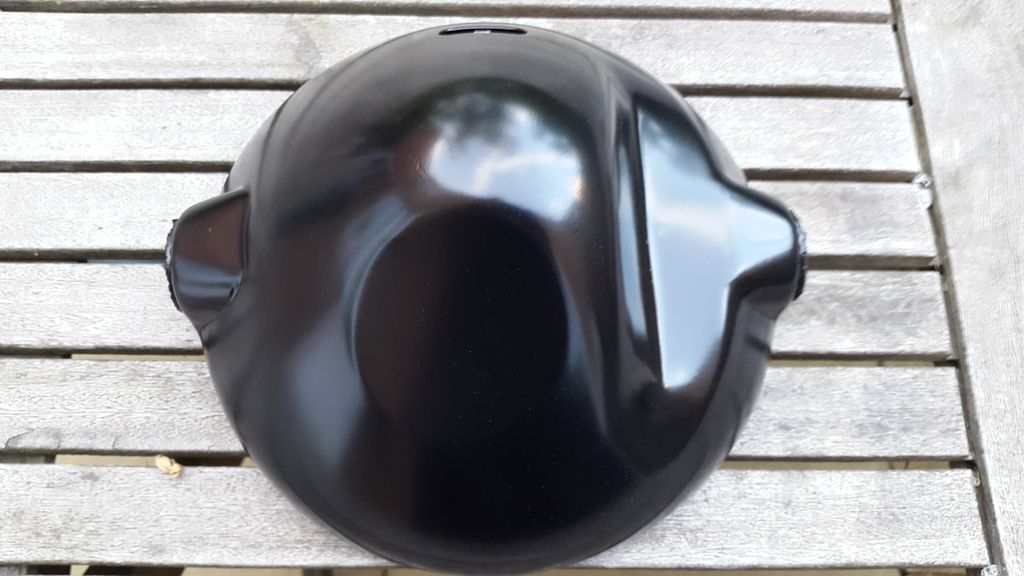
Headlight bowl was an odd colour too and had a few scratches that looked like painted over. So a rub down and rust preventer primer a couple of coats and then the same satin black for a couple of coats. Looks good now with no dents either. That also can get put away a cure for some months. Next the job which tbh I wasn't looking forward too of masking the brake discs to repaint as good as possible. Cleaned them as good a I could and so far have only masked the one as ran out of masking tape. Surprising how much one disc asks for. The basic masking is simple enough but its the having to cut around the rivets with a knife as close to the disc as possible without stopping the painting hitting the disc. 
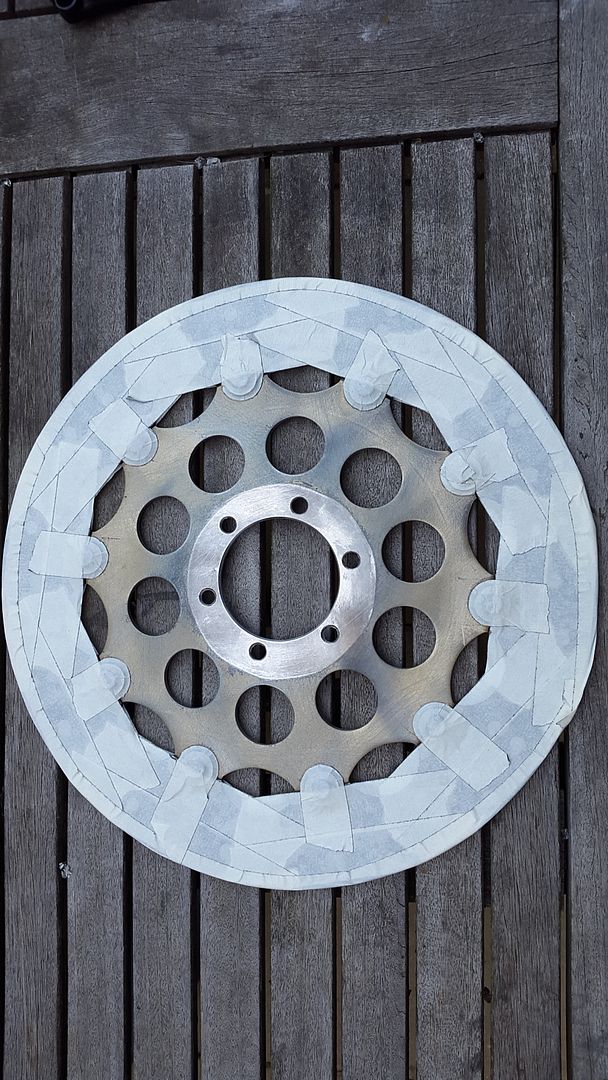
I got this as the best match I could find. I will not remove masking until I think its good enough colour match but looks alright against another painted disc. Hope to get cracking with the discs tomorrow with a good result fingers crossed.
__________________
http://albies93m900.blogspot.co.uk/ Last edited by Albie; 29-06-2015 at 07:21 PM.. |
|
23-06-2015, 05:45 AM | #14 |
Guest
Posts: n/a
|
Looking really nice Albie
|
23-06-2015, 07:12 AM | #15 |
Registered User
Join Date: Feb 2011
Location: Birmingham
Bike: Multiple Monsters
Posts: 227
|
Can't wait to see this finished Albie. I sold mine which was registered May 1993 in 2013. I've regretted it ever since
|
|
|