UK Monster Owners Club Forum » .: Technical :. » Mods & How To's » Ducati 1000 DS custom build

Reply
 
Thread Tools Display Modes
Old 01-02-2024, 11:26 AM   #1
buzzer
Registered User
 
buzzer's Avatar
 
Join Date: Jun 2018
Location: Wolverhampton
Bike: M900
Posts: 393
I have used these GPS speedos on a few builds now, it makes things simple, neat and light. The hole for the ignition switch made a handy holder for the warning light LED’s!


__________________
check out my blog! www.jtccc.wordpress.com
buzzer is offline   Reply With Quote
Old 04-02-2024, 10:30 AM   #2
buzzer
Registered User
 
buzzer's Avatar
 
Join Date: Jun 2018
Location: Wolverhampton
Bike: M900
Posts: 393
The rear number plate mounting looked OK, but it needed a hugger… I wanted to keep things as light as I could so I decided to try some carbon fibre.. first and probably last time as its a nightmare to work with! I had to buy a meter, so I decided to also make the battery tray as well… That’s currently drying, its nice and light but not that pretty, but its unseen so I will live with it. I used an old mudguard to make the mould and the hugger came out rather well! with what’s left I will probably make a front mudguard, we will see how that turns out, on this one I will try the vacuum bag approach.

The new 17″ front rim and new stainless spokes have also arrived. Expensive, but you can't have rusty spokes, it spoils a build

there will be a short interlude in updates now as we are off for some sun for three weeks!


__________________
check out my blog! www.jtccc.wordpress.com
buzzer is offline   Reply With Quote
Old 24-02-2024, 09:58 AM   #3
buzzer
Registered User
 
buzzer's Avatar
 
Join Date: Jun 2018
Location: Wolverhampton
Bike: M900
Posts: 393
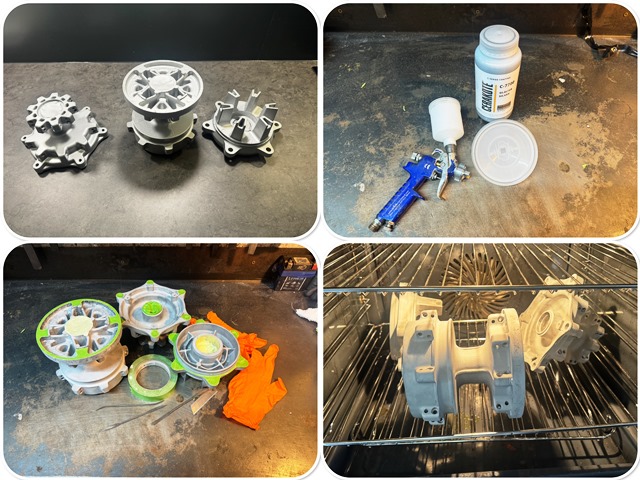
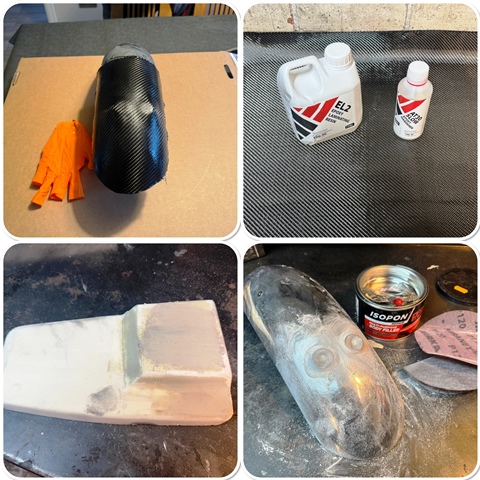
I have wanted to try Cerakote for a while due to the great reports of its durability and finish. So I purchased a pint to see how it went… its not cheap! I read the instructions on their knowledge base and it seemed simple enough so I thought I would start with the wheel hubs.

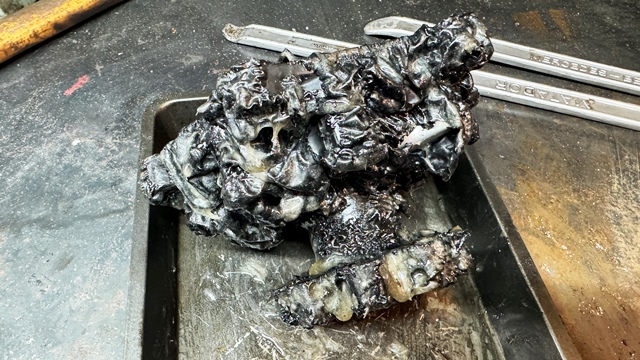
First job was stripping the thick powder coat off, and for this I used some commercial paint stripper. As you can see this makes short work of removing it! the stuff you buy from DIY stores is next to useless for this.

Next prep for the coating. I gave the hubs a good blasting with aluminium oxide grit to give it a key, then cleaned then in hot water with some detergent in. I never use washing up liquid for things like this (or rubbing down paintwork) as it contains silicone, which kind of defeats the object of trying for a clean surface! I then popped them in the warm oven for two reasons…. one is to make sure they are completely dry, and secondly if you mask them while warm, the tape sticks MUCH better. With regard to masking, I put the tape on, and then brush the edges with a riffler file and then you can peel it off perfectly.

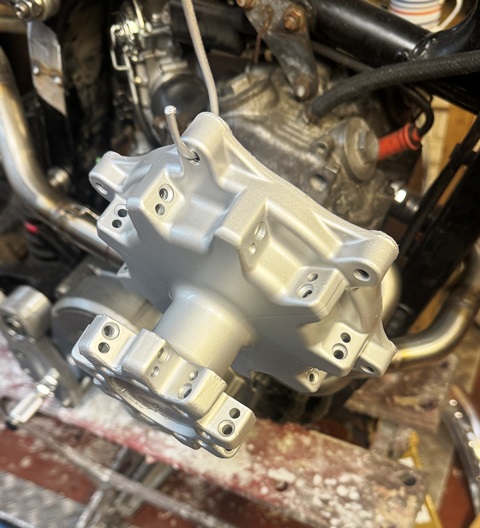
Next i gave them a single thin coat of Cerakote. I used a paper strainer as they suggested. Its very thin, but highly pigmented and covers really well. It flash dries in 45 mins, and is handleable in a few hours, but it takes 5 days to fully cure. I was impressed with the ease of application and the finish!
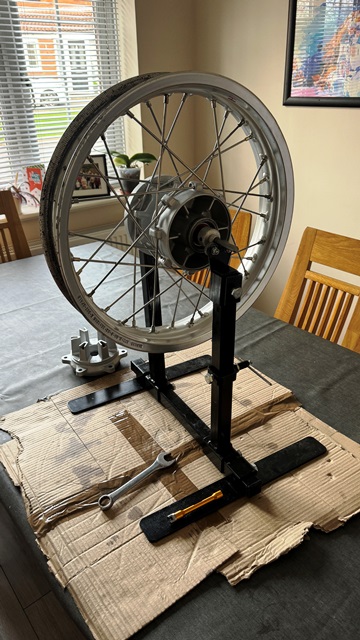
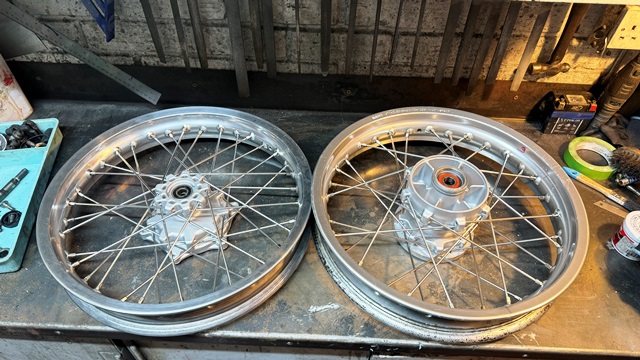
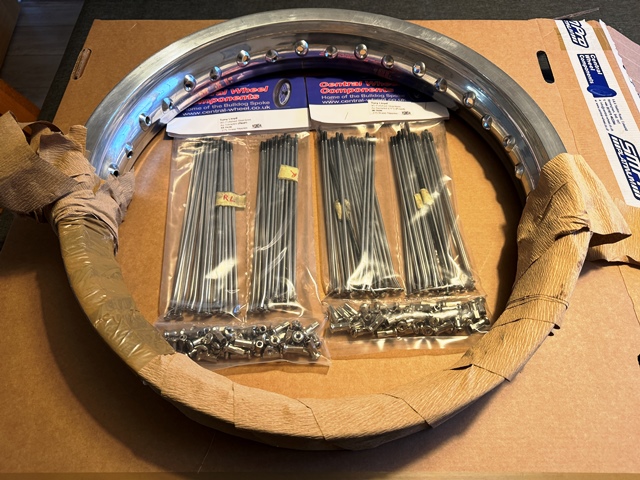


with the hubs now painted it’s time to try something I haven’t done before, and that’s wheel building. I watched a few videos on Youtube and managed to loan a jig off my mate, which actually proved really useful! I got special dispensation to do it on the dining room table as I knew it would take a while and I wanted to be able to sit down!

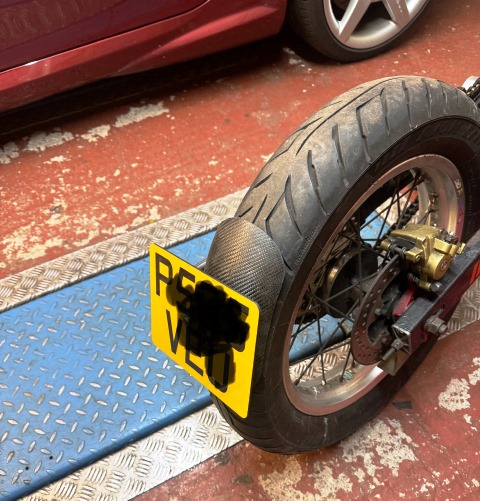
I was actually surprised how easy it was! I managed to get the correct offset, and up and down and side to side within half a mm.. here they are complete with new bearings and seals.


__________________
check out my blog! www.jtccc.wordpress.com
buzzer is offline   Reply With Quote
Old 25-02-2024, 09:10 AM   #4
buzzer
Registered User
 
buzzer's Avatar
 
Join Date: Jun 2018
Location: Wolverhampton
Bike: M900
Posts: 393
headlight brackets took some thinking about, but I had plenty of time to do it lying in the sun! thank goodness for the Ipad and Ipencil!. I sent the drawing off to the water jet cutters and they cut them out of some nice 25mm plate, they came out well. I also designed them so i could mount the custom made indicators. it will all be polished later as I like to do all the polishing over a few days, horrible and filthy job!


the carbon battery tray came out OK, I initially made an alloy one, but it hung down too low and spoiled the lines, so I made the carbon one stepped so the battery can sit in a recess to the side. its going to be tight with the electrics!


Here it is in profile, not long before i can take it all apart for painting! At this stage its really important to try to mount everything... you don't want to get it all painted/ powder coated and then find you are missing a bracket for say a horn! I also wheeled it around and found that the forks hit the tank... the lock stops are not adjustable on this so I am gong to have to extend them before painting...

I played around for hours on photoshop trying to decide on high, low, beak type mudguard, but decided in the end to go low with a carbon one... with the advantage of a nice fork brace as well. Just ordered some orange fork gaiters, will see what that looks like!

__________________
check out my blog! www.jtccc.wordpress.com
buzzer is offline   Reply With Quote
Reply


Posting Rules
You may not post new threads
You may not post replies
You may not post attachments
You may not edit your posts

BB code is On
Smilies are On
[IMG] code is On
HTML code is Off

Forum Jump


All times are GMT. The time now is 08:46 PM.

vBulletin Skins by vBmode.com. Powered by vBulletin® Version 3.8.3
Copyright ©2000 - 2024, Jelsoft Enterprises Ltd.